Showing posts with label Pink Paislee Yuletide. Show all posts

Friday, 4 December 2015

Christmas Grilling

Hello Sassy friends!

At this time of the year, lots of people are ask what we are going to be doing for Christmas. Being far away from most of our family, we usually start with a nice breakfast and then relax together while the BBQ takes care of our traditional lunch of slow cooked lamb leg and a whole chicken. The kids get to enjoy playing with their gifts and I usually end up in the hammock with a good read. Jolly blissful indeed!


I've used Pink Paislee's Yuletide for this page. I wanted to carry the BBQ theme across, so I created a little cut file using my Silhouette Cameo and backed the lower half with some 'Baked Goods' and for the flames, I've used some corrugated gold glitter cardstock. The white positive cardstock cuts have been raised on foam tape for a bit of added depth.


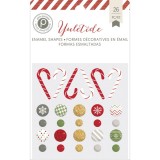
The Yuletide ephemera pack has so many useful bits and pieces. Personally, I love the mix of clear and paper die cuts. The foil touches add a sense of luxury. Adhering the acrylic shapes can be tricky sometimes, especially if you don't want the adhesive to show through. I will place a sticky dot in an inconspicuous spot (like under the print if it has one) or alternatively, you can use a product like Scrapbook Adhesives Adhesive Sheets. You simply place the embellishment onto the sticker layer, cover with the non-stick paper, rub then lift away.


I've mixed up a little bit of stamping with some cute Foiled Words. These are semi transparent and so pretty. I was trying to get my stamp lined straight on my block, but the edges kept turning up, so I totally just went with a wonky style and bent it into a curve instead. A cute way to use a long phrase.


Wishing you a bright and merry weekend!

Chantalle
xoxo


Friday, 27 November 2015

Sweets for my sweet

Hello Sassy Friends and happy weekend to you!

There are only a few more days of school left and my mind is firmly on teacher's gifts. I'm thinking something yummy and sweet might do the trick this year. Easy is also an added bonus, and if you have a Silhouette Cameo, or a steady hand, you can whip these little gift boxes up in no time at all!


I've loved creating with Pink Paislee's Yuletide all month. It's lent itself beautifully to mixed media, OTP and simple and elegant. So versatile. This box was created with a sheet of white cardstock and some leftover 'Wrapping Paper'. The box was cut by hand but you could also use a cute metal die.


The box opens to reveal a luscious red velvet cupcake. (Here's hoping it will withstand the December heat!) I've used the acrylic shapes that come in the Yuletide Ephemera pack as cute cake toppers.

The box is a 3D cut file by Lori Whitlock, available in the Silhouette Store.

My little star gift box is also a cut file (Amanda Walker) which you can find in the Silhouette online store. I've used a sheet of 'Frosty' as well as some sequin ribbon, some twine and a cute tag hand cut from a sheet of 'Baked Goods'.

A bit of white thread creates a nice bit of texture.

The star opens to reveal some jolly chocolate Santas, waiting to be gobbled up!


Wishing our overseas friends a very Happy Thanksgiving!

Thank you for stopping by today

Chantalle x


Create your own with these items from the Sassy Store

Friday, 20 November 2015

Pure Joy - Pink Paislee Yuletide

Hello Sassy friends!

Well it's definately getting very merry in the Sassy camp, with the build up to Christmas underway. Each year I promise myself that I will try and take better photos of the event, but in all the excitement (and terrible way-too-early morning light) my pics are decidedly average. This photo made me laugh out loud at the memory of an attempted sitting I tried to have with my kids a few years ago. They were getting along wonderfully until my little bub's mood took a turn. That face... too precious! I've captured the memory using Pink Paislee Yuletide.


The background is the leftover paper I had from my Festive Banner. The punched circles looked great when overlayed onto a sheet of Yuletide 'Fa La La' paper.


The title is very tongue in cheek to match this christmas cutie...


It's a mix and match of elements, with some Yuletide Jumbo Alphabets, a Heidi Swapp foiled memorydex card and the word 'Falalala' which I have hand cut from a sheet of 'Deck the Halls'.


Don't be afraid to scrap those not-so-perfect pics. They can provide just as much of a joyful memory as the 'well behaved' ones ;)

Thanks for popping in today.

Have a fabulous weekend

Chantalle x


Friday, 13 November 2015

Yuletide Holiday Banner

 Hello Sassy friends!

Woop woop it's Friday, and to celebrate, I've made a banner. Okkaaay, so it's not a 'Friday' banner, but something equally fun and decorative to start getting us in to a festive mood!


It really started with this cool Pink Paislee Yuletide Countdown paper. I thought about making a countdown calendar type thing, but I've made a few of those in the past. I knew for sure that I wanted to use the numbers, so I grabbed my trusty Fiskars shape cutting tool and circular stencil and began cutting each number out. If you have a large circle punch, life will be a lot easier for you!

Yuletide Countdown Paper 12x12


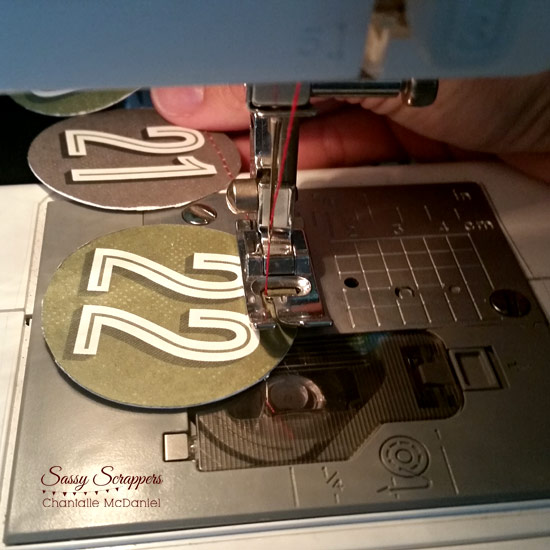
Once all the circles were cut, I used my sewing machine to stitch them together to create a long banner. Tip: Pull the element a bit after stitching and before you add the next element, so there is a bit of thread between them and they're not too bunched up.


I've also stitched on some Pink Paislee Yuletide large cardstock alphabet. These large letters have a really lovely pearl finish to them, which give off a gentle shimmer. So pretty. 
You can also find jumbo numbers, which are available in red.


Along with the stitched circles and letters, spelling out the words 'Merry & Bright', I have paired my sewn garland with some twinkling red sequin ribbon and a cute DIY pom pom banner.

You can create one easily by grabbing a pack of pom poms ($2 at a Discount store) and threading them along a length of embroidery floss. The needle goes into them really easily and you can adjust the spacing quickly. Mix up colour and sizes for a bit of variety.

All three garlands were then grouped and pegged at intervals.
 

In amongst there are also some tags from the Yuletide ephemera pack, which I have tied on using some white seam binding.


A really simple project that be altered to include any of your favourite holiday items. 
I am keen to add some little bells and fairy lights to mine! 

Have a go at making one of your own with these items from the Sassy Store

 Yuletide Jumbo Cardstock Alphabet 43/Pkg White ShimmerYuletide Foiled Acetate & Cardstock Die-Cuts 61/PkgYuletide Countdown Paper 12x12
Hug Snug Seam Binding - White (per mtr)

Thanks so much for stopping by today.

Wishing you a fabulous weekend!

Chantalle

Friday, 6 November 2015

Yuletide Baubles

Hello Sassy Friends!

Now that we have moved into November, we have the green light to start planning those all-important Christmas crafts ;)

Using the stunning new November moodboard as inspiration, I have created some cute DIY baubles with Yuletide by Pink Paislee.


You can grab a pack of these inexpensive clear plastic baubles from a Discount Store. They come in two halves which are easily popped together. I wanted my baubles to have two different sides, so I traced a circle around one half onto patterned paper to get the size, and then trimmed inside the line so it would fit inside. I tried a few techniques to get the disc to stay put and found a dab of hot glue on opposing sides of the paper disc did the trick.


Here is one using Yuletide 'Frosty' and a cute bauble ephemera which I've mounted using foam tape. I've popped some sequins inside too which really ups the festivities!


Here is another, using a 'Merry/Bright' circular die cut shape as well as a super sweet acrylic icicle, both from the ephemera pack.


Taking a look inside the bauble, you can see how simple it is to create something unique and eye catching for the tree. A gold foiled star, a few sparkles and perhaps a little enamel shape is all it takes!


You can stamp, emboss... put choccies inside or some cute little fuzzy pom poms. If it fits, it works!

I will confess that I had to knock on a stranger's door to borrow their planted Christmas tree to hang these, lol. Only a few more weeks and I will have my own up and ready to go :)


Here's another look at the November moodboard in case you missed it. We'd love you to play along with us!

Thanks so much for popping in today!

Chantalle x

 
Create your own with some clear plastic baubles and these items from the Sassy Store


09 10