Friday, 5 December 2014

Let's create: December Days 17-25

 Hello Sassy friends
Fridays seem to roll back around so quickly... I'm looking very forward 
to the start of the school holidays!

Thank you for stopping by to see how my December Days album has turned out. 
Hopefully the way the majority has already been planned, should help making documenting over this crazy month very easy indeed.

If you have missed my earlier posts,  
Click here for Day 9 -16

Welcome to the last post, part 3: Day 17 to 25
Day 17
Glitter cardstock, vellum, wood numbers, Merry & Bright stickers, ephemera

Get more out of some ephemera pieces by snipping them in half
Day 18
White cardstock, doily, wood numbers, ephemera, kraft envelope, patterned paper
I've given the moustache from the ephemera pack a coating 
of white glitter and then assembled it over the Santa die cut
It's hard to tell from the photo but this has been arranged on top 
of the black spotted acrylic page divider. The circle was left over 
from an earlier page and I've just tucked Santa inside
Day 19
White cardstock, doily, wood numbers, ephemera, kraft envelope, patterned paper
A square run through my Cuttlebug with a Couture Creations embossing folder.
Try stamping with Versamark on kraft. I love the effect. Heat emboss selections.


Day 20
White cardstock, wood numbers, ephemera, patterned paper, glitter alphas
Hide some journalling and a pic or two under a flap 
and embellish with some faux baubles. 
Simply trim and fold a piece of card, trim the end if you like 
and tuck your photo/journalling inside.

Pop a small hole in the top of the bauble die cut from 
the ephemera pack and machine stitch to your page

Day 21
Patterned paper, glitter stickers, wood numbers, ephemera
Create a cute shaker pocket with some of the spotty vellum.
 1. Trim a piece, 100mm across by 170mm high.
Fold up at about 100mm down the length.

2. Optional: Punch some shapes out of the vellum

3.  If you want to punch shapes in you pocket, insert a bit of acetate inside so you can see the confetti more clearly and prevent the bits from falling out.

4. Stitch three sides closed with a sewing machine.

5. Insert confetti and sew shut.
Tip: Place a bit of adhesive on one or two of the shapes 
inside the shaker so they don't all fall to the bottom.
For the date, I have made a feature out of the number printed on this bit
of Simple Stories paper that I trimmed to fit inside the album inserts.
To make your own frame, simply trace the shape onto some tracing/baking paper
Then place the traced shape onto a paper of your choice, and cut out.
Mount with foam tape.

Day 22
Custom die-cut, doily, wood numbers, ephemera, patterned paper, journalling tag
Create this sweet tree using scraps and then machine stitch down.

Day 23
Patterned paper, wood numbers, Sn@p card, journalling tag
Day 24
Glitter cardstock, wood numbers, ephemera, Merry & Bright stickers, patterned paper, journalling tag
 Heidi Swapp has done a gorgeous free printable with a December theme.
 This cutie has been punched and set in an Epiphany Crafts round tool.

Day 25
Custom cut file, wood numbers, ephemera, Merry & Bright stickers, patterned paper, journalling tag
 For my final day I wanted to echo the notion of gift giving and have hence, 'wrapped' my last page!
 It's a bit tricky to explain exactly how I did this, hehe.
It was very easy actually: just fold in the canvas page and then measure
how much ribbon you will need roughly, by wrapping the area.
 Make it neat by threading the ribbon through the actual canvas itself.
1. Measure how wide your ribbon is.

2. Cut two slits in the canvas as shown below

 3. Now thread your ribbon through the slits

This is what it looks like when opened...
Thank you again for your interest in my December Days album.
If you are going to be making one, be sure to tag us, 
we would so love to see your creations!

Till next time!
Chantalle

Grab yourself a kit from Sassy Supplies!

Thursday, 4 December 2014

Christmas Gift Box - Echo Park

Hi everyone,
Anita here sharing a fun little homemade gift box simple and easy using your silhouette
I opened a mini gift box cut file in silhouette studio
And used some light green cardstock matching the light green colour in the collection


I decorated the box with stickers and patterned paper


I added a layered  poinsettia with holly leaves on top 
with bobunny glitter paste twine and some bling


I hope this inspires you to get creative and make a little gift


Products used
 
Red Bakers Twine 2mtrsChristmas Cheer Element Stickers 12x12Christmas Cheer Snow Globe Paper 12x12
Christmas Cheer Rudolph Paper 12x12Christmas Cheer Ho Ho Ho Paper 12x12Christmas Cheer Alpha Stickers 12x12
Double Dot Silver Glitter Paste 50mlKaisercraft Rhinestones SilverSilhouette Cameo Electronic Cutter Machine plus BONUS Teal Dust Cover

Happy Crafting
Photobucket

Wednesday, 3 December 2014

All That Glitters - Websters Pages


Hello to all our Sassy Scrappers! Leonie here today and
welcome to December and lots of Christmas inspired projects for you on the Sassy blog.
I'll be using the Websters Pages collection - All That Glitters and the NEW December Moodboard leading up to Christmas to get you scrapping those Christmas photos.


Today I'm going to show you how I've scrapped photos' from Christmas' several years apart.
The theme of my page is based on Dickens - 'A Christmas Carol'.  Having used a photo from Christmas past and Christmas present.  The photo's were both taken on Christmas Morning, eight years apart.  They clearly show that not much has changed with one of my sons.  Just as happy with a cricket bat and ball now as he was when he was two years old.


I love this cool Bokeh patterned paper from the 'All That Glitters' range as the background for my page.  There are also several bokeh and glitter patterned vellum papers in this collection which are just gorgeous and are great for layering on pages or even for pocket page inserts.

 I combined the bright green of the bokeh paper with the natural wood grains and 
timber patterns of the Deer Ones paper.
The Deer Ones paper was fussy cut and some of the picture frames used to layer behind the photos.  I've also added some stamping in a neutral timber colour and some stencilling with gesso to the base paper.


I used one of the 'Storeyteller 1' Jouranlling cards which also had the bokeh print on it to form part 
of the title along with the gold mini letters.


So how have things changed over the years in your Christmas Photo's?  
Are they much the same or vastly different, 
why not have a go at documenting Christmas past and Christmas present on the same page. 

Click on the links below to take you straight to the Sassy Scrapper shop where you can buy 
some of these lovely Websters Pages papers and don't forget to join us in our December Moodboard Challenge...We would LOVE to see your entries..

Cheers,
Leonie Neal-Dawson.
     
All that Glitters Catch a Star Paper 12x12All that Glitters Deer Ones Paper 12x12
All that Glitters Holiday Cheer Paper 12x12 All that Glitters Storyteller 1 Paper 12x12All that Glitters Word StickersAll that Glitters Little Letters Gold Stickers
Photobucket

Monday, 1 December 2014

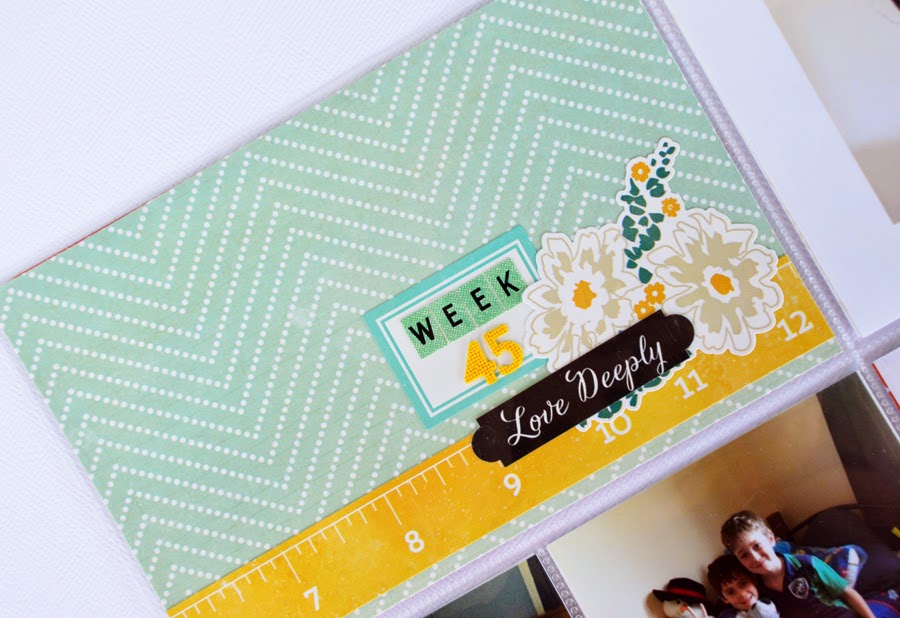
Project Life | Week 45...

Hello Project Life fans!  Today on the blog I am sharing Week 45 | November 3 - 9.  Next week I am going to skip ahead to Week 49 so I can play with the new Sassy December Project Life kit - now available in shop here.
This week I have delved deep into my left over supplies to create a spread embellished mostly with stickers!  I absolutely love the versatility of stickers, whether they are in the form of word strips, floral patterns or big and bold quote blocks.
 

I don't know about you, but November always seems like it is never long enough.  Too many things to accomplish and not enough time to get everything done.  Especially before December comes rolling around...


For this reason, I have kept my spread relatively simple.  Clean lines, complementary colours, significant photos and essential journaling.  It still seems like quite a lot, but once the photos for the week have been selected and positioned on the spread, the words flow naturally.  Generally, I take my journaling cues from the photos and combine most of my notes into a weekly round up.
 
Once I have my photos and words, I get to play with dressing up my pages.  This week's choice of embellishments, as mentioned before, are stickers.
 

In the title pocket, everything minus the background patterned paper, is a sticker.  I deliberately chose a black Teresa Collins label sticker to layer the yellow Carta Bella "inch ruler" image to mimic the bee costume in the adjacent pocket.
 
The remaining stickers in this pocket are placed in a cluster, overlapping each other to create visual interest, while still maintaining surrounding white space.  The date pocket was also created from more stickers mounted to a black and white polkadot patterned from the Heidi Swapp September Skies collection.
 
 
In the lower right corner on page one, I needed another pop of yellow to balance the border strip from the title page and the photo of the yellow popping candy.  The geometric heart from the Carta Bella Hello Again collection, not only shared the same hue of yellow, but the angular pattern matched the angles from the white bowl holding the popping candy.
 
 
Word strips are a wonderful way to help build sub stories on a PL spread.  On the photo below, these two five year olds are having a great time experimenting with bubbles while at the same time, learning.  I thought the words reflected their personalities perfectly!
 
 
I continued with this sub story via the words strips, on page two.
 
 
In the top pocket, the word phrase is ideal to document a rare treat for my boys.  The speech bubble embellishment sticker was mounted on foam tape for subtle dimension.  And perfectly sums up the morning my youngest two had together, while their older siblings were at school.
 
 
Word strips are also ideal for covering mistakes! The phrase below was added to cover a typo from my typewriter.  The pop of also creates another visual triangle on my spread, particularly on page two with the speech bubble and the birthday cake.
 
 
This week, I didn't want to over complicate things or find photos I really didn't have.  The large sticker quote from the Glitz Designs Finnley collection was a great way to fill space.  Not only does the colour relate back to the title pocket, but mounted onto the grey paper from the Heidi Swapp September Skies mini paper pad, the neutral colours allow an opportunity to introduce more of the blue/grey colour with the enamel dots.
 
 
The word strips are also idea for creating interest on a collage photo.  This extra detail, no matter how minor, helps to relay more of the story.  Remember, keep it simple!  Especially if you very little time to try and to accomplish it all!


Thanks for visiting...x
 
Ps - Don't forget to come back next week to see how I've started to construct my PL during December!  See you then.


September Skies Word Strips
 
Studio Calico Label Stickers
 
Hello Again Element Alpha Stickers
 
Finnley 12x12 Titles & Accents Stickers
 
Something Wonderful Decorative Stickers Sheet 6x12
 
Photobucket
09 10