Kylie here with you all again today, sharing how I have set up my new personal sized planner with accessories I've made from the 'Chasing Dreams' collection from Maggie Holmes.
I find making dashboards and dividers for my planner....(cough cough *planners) completely relaxing, and the best part is you can customise them as you please to suit your own style.
Here is a little look at the opening of my planner.
To the very front I have made a shaker dashboard, adding in some mint green sequins.Here is a little closer look.....I was super happy how it turned out-
This was created by using a clear pocket page and my fuse tool.
Next is a bookmark.It is probably half the width of my dashboards and I have included a tab to the top.I will usually move this bookmark to the area of my planner I am working on to make it quicker to find.
As you turn towards my first divider you can see gold polka dots! I have created another dashboard from the gold polka dot acetate paper.It is so sparkly!
Here is a closer look at my first divider without the polka dots over the top.
My second divider.....
And third!
This really made a perfect collection for creating this project.Here is a little look at all the units out of the planner for better view.
I have laminated all the dividers and cards I made.I find this makes them more durable especially since I like to embellish the front of them.
I hope you have enjoyed seeing my project this week.I will list all the products I have used below.
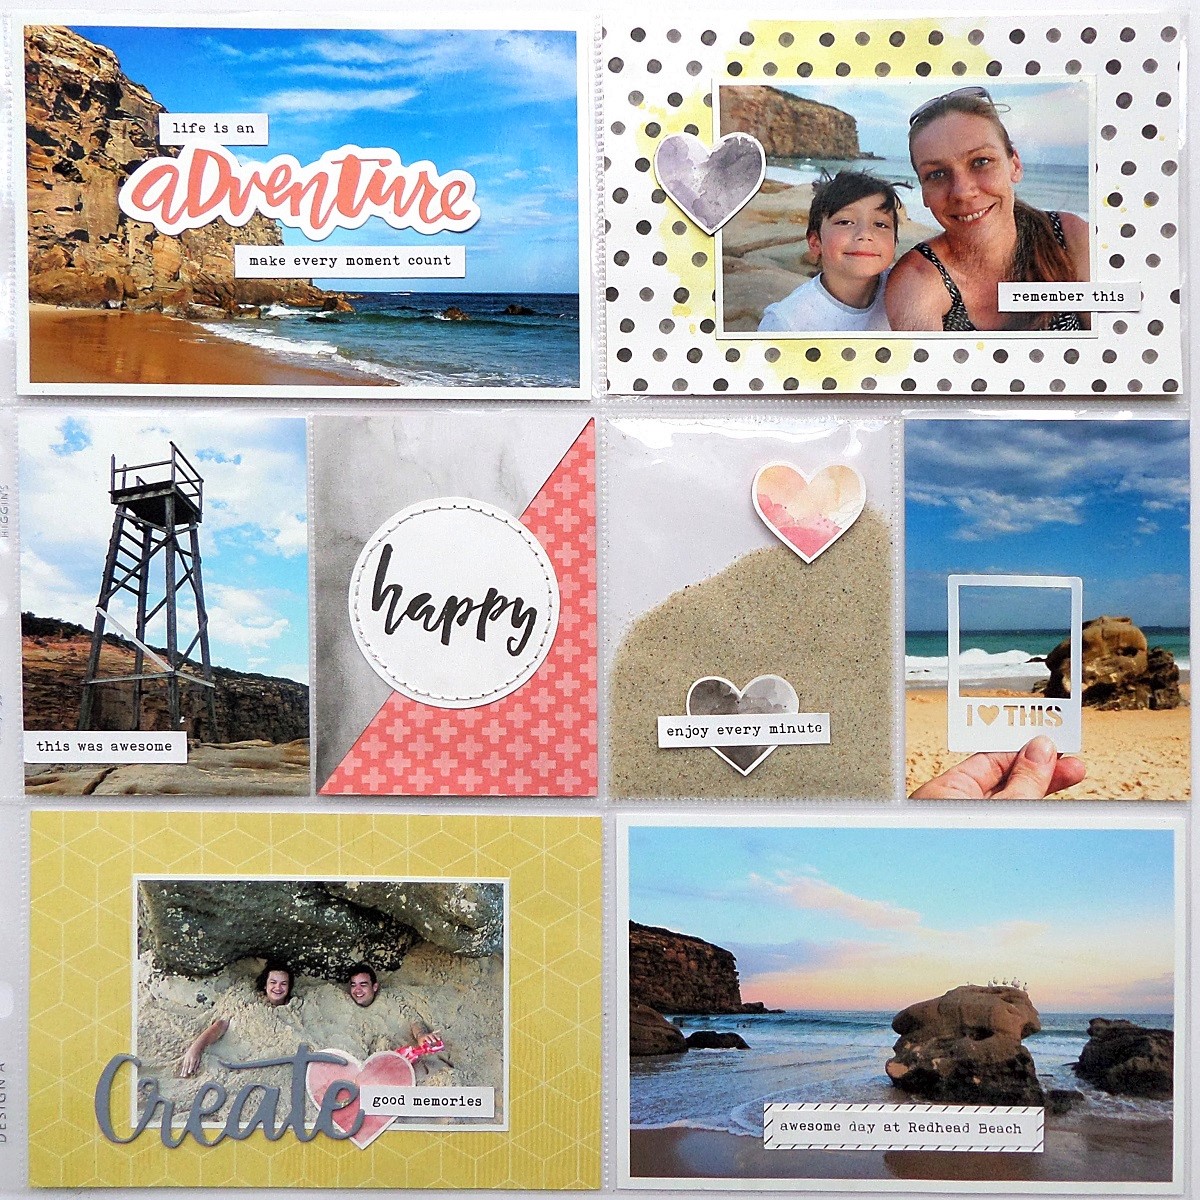
Hi again :) I have completed the insert I mentioned in my previous post documenting one of our summer adventures.
I kept to the same products as the previous pages, with more watercolour elements to help tie things
together.
I combined a die-cut word with some simple journal strips to begin the page, and often use landscape photos as a backdrop for my journaling. I added a section from one of the watercolour cards I created in my first post to create a fun filler card - using the stitched accent to visually ground the two sides together.
Bringing home a little bit of the beach with us, I used my fuse tool to enclose some beach sand into one of the pockets - adding a few hearts from the Pink Paislee Moonstruck 'No:6' Paper on the outside of the page protector.
Printing some of the pics smaller than the pocket allowed me to add colour with a patterned paper background as well as some dimension with the fun Hazelwood Chipboard phrases.
Using the reverse side of the insert to document a different location - I created a couple of split cards that combined different patterned papers for an easy way of adding more colour.
I used a frame from the Maggie Holmes Gather 'Moments' Paper and a chipboard accent from the Hazelwood Chipboard Thickers as a place to ground my journaling over another landscape photo. You can also see the reverse side of my sand pocket here and how I added another heart to hide the adhesive from the other side.
I created another split card as a background for a smaller photo and used more watercolour hearts from the Pink Paislee Moonstruck 'No:6' Paper to add more interest to the page.
Hi again, Agnus here with another share from my project life album.
I am still using the same items I used for my first January post, but by changing the focus from the teal accent colour to the vivid blue from the b-side of the Gather 'Moments' Paper, I was able give the same products a slightly different look.
Using one of the cards I created from my watercolour resist post, I used more paint to colour half of gold foiled accent piece before adding a simple date strip to mark the start of a new week.
I normally print my journaling directly onto my cards, but regular printer recently stopped working so I am going with printed journal strips and like the way they help to tie all of my pockets together.
I cut out a few frames from the Gather 'Moments' Paper to use as a place to ground the journaling onto the page.
We spent a couple of nights at the coast to celebrate my son's birthday and while I will be using an insert to document the adventure, I used the second half of my spread to document some of the details that might have otherwise gone unrecorded.
I am making an effort to collect memorabilia when we are out and about this year, and used the napkin from one of the restaurants we ate at to create a custom filler card.
Creating a simple vellum pocket to hold a few business cards - I did this by wrapping the vellum around my card and using tape to secure it to the back of the card.