Thursday 29 November 2012

More from Yours Truly ....


A little tutorial today on how to customize those
super cute Pink Paislee Artisan embellishments!


I used this gorgeous set and simply altered it to suit my page.
Larger Image 

After putting my page together, I{using the Yours Truly line from Glitz} realized I
didn't have the right colour title. The Artisan Words hold colour perfectly!

I cut out the desired word first, leaving it on it's backing.

Using a paint brush, I chose a spray mist (I used a really dark blue from Maya Road)
and painted the lettering.
 

I gave it a generous coat, then using some paper towel, dabbed off the excess.
I did this a couple of times to get the right shade of blue I was after and then set it aside to dry.

 
Peel it off the backing and stick to your page! Simple as that!

This photo is of my super talented and sweets friend Nic Howard and myself take at the Spring Escape Retreat in New Zealand in October - awesome creative chick!


 I'm pretty pleased with the results!


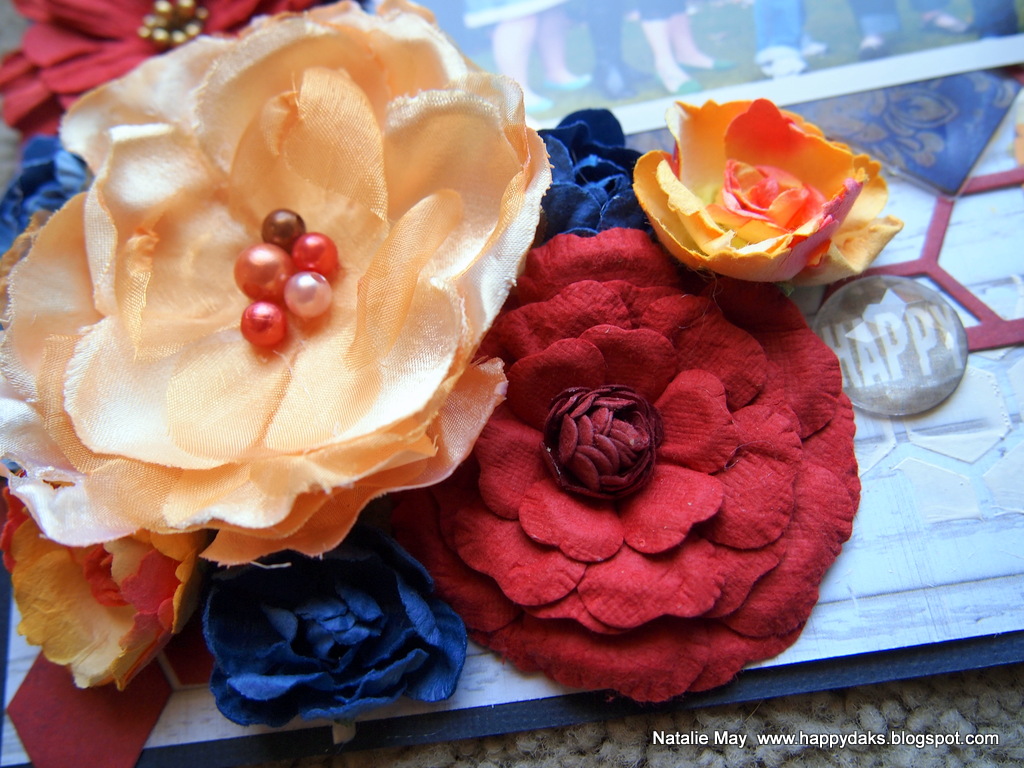
Other items I have used:

Prima Flowers: Serenade Blue
Bo Bunny Flowers: Wildberry Zinnia

So that's it from me today!
Be good and stay safe
xxxxx

Wednesday 28 November 2012

The Sweetest Thing - Layout Tutorial by Samantha Hauzer

Hi Everyone,
Olga here tonight with a fabulous Tutorial by the talented Sam Hauzer..I love Sam's mix of colours and I absolutely love the detail in her layout, so I couldnt help but share her wonderful work....We have been lucky to have Sam create some instructions on how to recreate her layout...Enjoy...


Sweet Thing – Layout Instructions


Product List:
All products are available from our Store HERE or click on the link..www.sassyscrapper.com.au

  • The Sweetest Thing Tangerine Happy Sunny
  • The Sweetest Thing Tangerine Together Round
  • The Sweetest Thing Tangerine Hello Greetings
  • The Sweetest Thing Tangerine Wonderful Delighful
  • The Sweetest Thing Tangerine Happy Layered Stickers
  •  Imaginarium Words Love Cherish and Adore. #IDW0026
  • The Sweetest Thing Tangerine Hello Buttons
  • American Craft Thickers, Niki Riki: 53041
  • Prima Flowers Aria D: 561994
  • Prima Flowers: Charlotte Melon: 557300
  • Yellow Twine by the metre
  • Black Pen
  • Other - Resin Products

 Instructions:

1.     Start with a base of The Sweetest Thing Tangerine Happy Sunny, and doodle around the border with a black pen.

2.     Cut a circle with a 20cm diameter from The Sweetest Thing Tangerine Together Round paper, making sure you cut as close to the edge of the paper as possible, so you are still able to use the remaining paper. Draw around the circle with black pen and put aside.

3.     From the remaining The Sweetest Thing Tangerine Together Round paper, cut 4 strips which are approx 2.5cm wide. Fold them roughly, concertina style, then attach them around the circle, applying strong glue or double sided tape to the underneath of the circle to keep them in place.

4.     Attach the circle to the centre of your page.

5.     Using a black pen, draw a border around a 5x7 photo, and place on the left side of the circle on your page.

6.     Place a sticker from the The Sweetest Thing Tangerine Happy Layered Stickers slightly overlapping the top right of the photo.

7.     Cut some words from the The Sweetest Thing Tangerine Hello Greetings paper, outline with black pen, then place them on the right side of the circle, underneath the Layered Sticker. Add some journaling.

8.     Cut some flowers from the The Sweetest Thing Tangerine Wonderful Delightful paper, and overlap them around the photo as shown.

9.     Paint the #IDW0026 Imaginarium Words Love Cherish and Adore words and arrange them around the photo.

10.   Add a title around the circle on the page using Thickers or other alphabet stickers.

11.     Embellish your layout using The Sweetest Thing Tangerine Hello Buttons, flowers, resin, twine and anything else you like!


Happy Scrapping
Olga..xxx
www.sassyscrapper.com.au


DESIGN TEAM CALL 2013

Hi Everyone,

Are you a talented, motivated and fun designer with fresh ideas, who has a passion for creating and who has the time to commit to designing layouts and projects each month with our fantastic range of products??

We are looking for you to join our Design Team for 2013..

To apply and for further details outlining DT Expectations, Terms and Rewards please email us at: sassyscrapper@wideband.net.au

  • Full name, address, phone number.
  • An example of 2 layouts, 1 card and 1 project representing your best work and style.
  • A link to your personal blog and to the online galleries or message boards that you post on.
  • Design teams that you are currently on.
  • A brief paragraph telling us about yourself.


Submission deadline is December 18th 2012.
Our design team members will be announced in early January 2013.
We thank you in advance for all your work and look forward to receiving your submissions.

Thankyou
Olga and Eva..xxx

www.sassyscrapper.com.au

Friday 23 November 2012

Step by Step with GDT Trudi Harrison

Hello Everyone,

Trudi here with you again.

I have been playing with the gorgeous Glitz Design Cashmere Dame collection and have a step by step for you today.

We are going to be recreating this -

'Love this girl forever'


Materials:

Glitz Design Cashmere Dame – Gingham, Floral, Cherries, Banner, Puffy Word Stickers, Giant Rhinestones, Layered Stickers; Heidi Swapp - Vintage Chic Black & White Buzz Words,  Sugar Chic Bow Ties, Colour Shine Spritz- Mustard; Prima - #560171 Romance Novel SIIC Pearls & Crystals, #562144 Bel Canto Yellow,#561420 Interlude Felt Red Roses, #562595 Rosarian Perles , Pink Paislee Artisian Butterflies,
Glimmer Mist – Turquoise, Texture Paste, The Crafters Workshop Template – Chicken Wire, Martha Stewart Vintage Floral Border Punch 
www.sassyscrapper.com.au
 

*****
Instructions:

Trim approximately 1cm off each of the sides from the Gingham paper.  Position slightly angled and attach light pink side up over the reverse side of the ‘Cherries’ (red side up).


Add some background detail.  I used The Crafters Workshop chicken wire template with some texture paste and Turquoise Blue Glimmer Mist.

Cut a strip from the ‘Chevron’ paper and a scalloped semi- circle element from the ‘Floral’ paper - I used a 12” scalloped circle die cut to create this.
Position and attach. 

Cut long strips from coordinating strips of papers and layered over the top – I used ‘Banner’ and ‘Gingham’ for this.
Cut up some of the Prima SIIC packaging and position similarly.


Hand cut floral elements from the ‘Banner’ Paper. Position and sit photo over the top.  Attach with foam tape. 
Add the Prima SIIC flourishes – the larger one sits underneath and a smaller one on top.


Add some flowers - this cluster consists of Prima Interlude Roses - pale pink and red  and yellow Bel Canto.
Position and attach one of the Glitz Cashmere Dame layered stickers over the top left hand corner of the photo.


Add a Heidi Swapp Bow Tie and a large Glitz rhinestone.
Add the third Prima SIIC flourish to the top right hand corner of the photo and some more flowers.


Mist a small Artisian butterfly with Heidi Swapp Colour Shine Mustard and attach underneath the top floral cluster. Add some Puffy Word stickers.
Cut out the banner element from the ‘Banner’ paper and attach this also.  Add a rhinestone to the end.
 
 Add one of the Heidi Swapp Black & White Buzz words and you are done!


Thanks so much for dropping by the Sassy Scrappers blog today.

Happy Glitz creating!

Trudi


Thursday 22 November 2012

Yours Truly ....

 Hello there

Natalie here today to show you a page using the new Glitz papers, Yours Truly.

I love the dense, rich colours in the paper line and had no trouble creating with it!
I added flowers from BoBunny & Prima to enhance the Glitz embellishments.


On the background, I used a mask from The Crafters Workshop and some gesso to add a little dimension and interest before lightly splattering with mist.


These are the papers and products that I used.


Yours Truly ChevronYours Truly EphemeraYours Truly Motif
Yours Truly PolkaYours Truly Stripe 
Yours Truly Giant RhinestonesYours Truly Peekaboos 
Soprano Yellow 12pkBlossoms Wildberry Zinnia Serenade Blue 12pk 
Banda Golden Yellow 2pk


Hope you are all having a great week!

Natalie
xxxx

Wednesday 21 November 2012

Design Team Call 2013

Hi Everyone,

Are you a talented, motivated and fun designer with fresh ideas, who has a passion for creating and who has the time to commit to designing layouts and projects each month with our fantastic range of products??

We are looking for you to join our Design Team for 2013..

 
To apply and for further details outlining DT Expectations, Terms and Rewards please email us  at: sassyscrapper@wideband.net.au

  • Full name, address, phone number.
  • An example of 2 layouts, 1 card and 1 project representing your best work and style.
  • A link to your personal blog and to the online galleries or message boards that you post on.
  • Design teams that you are currently on.
  • A brief  paragraph telling us about yourself.


Submission deadline is December 18th 2012.
Our design team members will be announced in early January 2013.
We thank you in advance for all your work and look forward to receiving your submissions.

 
Thankyou
Olga and Eva..xxx

www.sassyscrapper.com.au

Monday 19 November 2012

Kaisercraft Save the Date!

Hi everyone! Hope you all had a wonderful weekend. I have a few projects to share with you all today, using the FABULOUS Kaisercraft Save the Date collection, which you can find in the Sassy Scrappers Shop HERE. It's the perfect paper range to use for scrapping birthday layouts and cards, but the gorgeous colours in the papers make it great for scrapping just about anything else as well!

“E” Plaque


To make this project, I used a Kaisercraft BTP plaque. (you can check out the awesome range of Beyond the Page products in the Sassy Scrappers shop HERE) The Square Plaque was so great to work with, I just basically made a small layout straight onto the wooden base. I love how bright and fun the Save the Date papers are, and they’re not just for birthdays, but great for general layouts and projects too.

“The Giant Ice Cream” Layout


As soon as I saw the ice creams in this range, I knew I had to scrap these photos of Emily pretending to eat a giant ice cream! The little quotes on the die cuts that I used were just perfect, and so were the ice cream die cuts and epoxy stickers. And I couldn’t go past using one of the cute pinwheels on this page. They are so easy and quick to put together, and are the perfect fun embellishment to use!

“Birthday Card”
 

The Save The Date collection is perfect for making birthday cards for people of all ages, and the die cuts in the Collectables make card making so easy!

I hope you enjoyed this rather long post today! Don't forget to grab some of the gorgeous Save the Date papers and embellishments right HERE in the Sassy Scrappers Shop :)

Have a great week!!

Friday 16 November 2012

Some more Cashmere Dame 'love'


Hi Everyone,

Trudi here again today with some more Glitz Design Cashmere Dame inspiration for you.

Now I do have to confess to loving me some colour.  There is just something about bright, happy colours that just make me smile.
I had so much fun putting this one together -


Layout ' 'Love' by Trudi Harrison

Sassy Scrappers Materials:
Glitz Design Cashmere Dame – Honeycomb, Chevron, Floral, Banner, Gathered Crepe, Giant Rhinestones, Paper Garland; Prima – Rosarian Perles, Interlude Felt Red Roses, Pink Paislee Artisian Butterflies, Heidi Swapp Colour Shine Spritz – Mustard, Bo Bunny Rhinestones, Twiddleybitz  FRA018 Frame Circle Doyle, Kaisercraft Black Cardstock

Other: 
Ribbon, Balloon, Rosette and Flourish Die, WRMK Punch,Texture Paste, Glimmer Mist – Turquoise Blue and Chalkboard Black 
To make the colour 'pop', I added black cardstock.

The Glitz Gathered Crepe adds fun and texture – here I have attached it to the back of a large cut circle element to create a ruffled border effect.
Glitz Paper Garlands were added behind the photo to add detail along with die cut cardstock and chipboard elements.


Thanks so much for dropping by the Sassy Scrappers blog today.  
I have had a total blast creating with this fabulous collection and thank Olga once again for allowing me the opportunity of Guest Designing for Sassy Scrappers.
I hope to have inspired you to 'glitz' your next creation.

Happy Creating,

Trudi
09 10