Thursday 28 February 2013

Sleepy Kitty

hi their
 Anita here sharing another layout using Pink Paislee - Hometown 
 of my fur baby

i have flicked black paint with a paint brush onto my cardstock
and out lined a few bits on my layout 
ive used another beautiful Bobunny blossom
these are available in store Here
here a quick video Tutorial on how i created my layout


i hope you all enjoyed my video
Happy Crafting

Wednesday 27 February 2013

October Afternoon Woodland Park Layout.....

Hi,

Rikki here and its the last share of the month for me. I have to say this range has pushed me to work with things I normally wouldn't and the experience of that has been amazing because I wouldn't have been able to create my next share..... and I am a little sad that I have no more October Afternoon Woodland Park paper left might have to go shopping at Sassy Scrapper's store....


As you can see this particular paper from Woodland Park had inspired me to get the sewing machine out and add some finer details....


The Woodland Park Miscellany embellishment pack came in hand, it was the perfect background and easy to do....


The  Prima Soubrette Blues flowers work and complement the Green Tara flowers.....
 
 
Ever wonder what to do with the wire in the back of flowers rather than cutting it off? Just wrap it around then end of a pen to make a little spring....
 
Woodland Park Miscellany
 Green Tara
Jillibean Soup Newberg Navy Alphas


Prima Soubrette Blues flowers


So I hope this inspires you and don't forget to go shopping at Sassy Scrapper's (before I go and buy more of this range, my DH thanks you in advance lol :P )


Tuesday 26 February 2013

Kaisercraft Flora Delight- Love Card

Hi There!

Shell Carman with you today. I'm sharing my last post for Feb using the Kaisercraft Flora Delight collection. I have put together a simple card that was quick & easy to do!


I have kept the sentiment simple with just the word 'Love' so you could use the card for anything from Engagement Parties & weddings to Birthdays or Mothers Day

I used some Kraft cardstock as a base to give a more vintage feel

I left the Kaisercraft wooden frame raw so that it would blend with the kraft paper

I have used lots of collectable with the sentiment, frame & flourishes. Some flowers, seam binding & bling were used to finish off the look!

Products from the shop
Kaisercraft Flora Delight Chique
Kaisercraft Flora Delight Enchanting
Kaisercraft Flora Delight Collectables
Kaisercraft paper blooms- Coral
Kaisercraft wooden flourish-Frames
Kaisercraft Flourish Decorative Antique Gold

You can find Kaisercraft Flora Delight in the shop here

Don't forget you still have until Feb 28th to get your entry in for the Feb sketch challenge!

Thanks for looking!
Cheers

Monday 25 February 2013

Project Life - Echo Park Photo Freedom

Hi everyone! It's Sam Hauzer here, with another layout to share using the awesome Echo Park Photo Freedom V1. These pages are actually a double page spread, using two different style photo sleeves. I think my favourite style photo sleeve is this one with the four spaces for 6x4 photos, and four spaces for 2x3 photos...


This next one is using the photo sleeve with spaces for six 6x4 photos, which I still love...


If you haven't tried this style of scrapping yet, you just have to give it a go, it's so much fun! I think the hardest part for me is taking a decent photo of the layouts through the photo sleeves!!

The papers in this range are so bright, and so easy to use, perfect for a Project Life album...


You can grab this range in the Sassy Scrappers Shop HERE, and get started on your album today!


Saturday 23 February 2013

More Kaisercraft 75 Cents

Hello its me Kim again for my Saturday post as promised today I am sharing with you all a mixed media LO completed using the Kaisercraft 75 Cents Range I have also used lots of the Heidi Swapp Colour Shine  and Tattered Angles Glimmers.

I have used lots of metal charms well as Prima and Kaiserascraft flowers.

I am sorry the full LO has  to be removed but it is out for publication in Scrapbooking Memories

Too create this effect I have taken my background paper and adhered it to a sheet of cardstock this is mainly to stop it buckling I then took a stencil such as a Crafters Workshop and some modelling paste and created the background, while this was drying I started layering my papers and photo with 3D tape  to give some depth to the LO when I had this done I then placed it onto my background paper even though it was still wet I then started to add my embellishments when I had them how I wanted them I started to spray with the mists including over the embellishments.


Friday 22 February 2013

Thirteen Months

Hello everyone and happy Friday!

I've got another little layout for you, using the gorgeous Sn@p Life! Collection.


I've used quite a few bits and pieces on this layout, along with some machine sewing.  The Sn@p  Cardstock (#2804) had some great journaling prompts to help me paint a picture of Erin's life at 13 months. The Studio Calico wood veneer turned out a touch dark after I misted it, but I still love it. I've punched a little hole in a Fundamentals Cardstock sticker to create a mini tag.


I used the gorgeous #2816 Teal for the background and misted some Jeni B Bleu Shimmerz Vibes using a Hexagon Crafters Workshop template. I've used a couple Hexagon cut outs and Pink Paislee Mistable arrows


It's such a joy working with this collection, because everything goes together so effortlessly with loads of options!


Products used: Sn@p Life! #2816 Teal, #2804 Journaling/Cardstock, #2814 Title Strip, #2808 Calender, #2817 Red Ledger, #2807 Sn@p Stripe, #2821 Bingo Cards, #2802 Fundamental Stickers, Studio Calico Veneer Shapes #22, Pink Paislee Artisan Chipboard stickers, The Crafters Workshop Mini Hexagons template, Shimmerz Paints Vibes Jeni B Bleu, American Crafts flair, Silhouette Cameo, Twine

All these products and more are available at the STORE

Happy creating!

Chantalle

Thursday 21 February 2013

2013 ...

Hi everyone... Anita Here !!
shearing another Pink Paislee layout


you can get so many different colour combos using this wonderful range of paper


on my black cardstock i stamped a foam stamp that i made with gesso all around the edge of my black cardstock


on my white cardstock ive 
mixed gesso and a drop of black paint so it would be a light grey and stamped my foam stamp  a few times
it also helps to sew your 2 bits of cardstock together before misting it as its helps keep it flater

flicked Black Kaisercraft paint
 misted
Spritz Cotton Candy Spray

the background was fun to create
 >>>>>>>>

 and here is a card i have created using some of my left over scraps of paper


 copic colours used - C-2 Y17 Y02 G05 G14

Happy Crafting


Wednesday 20 February 2013

October Afternoon Woodland Park - Layout


Hi,

Rikki here today. Have you ever had one of those days where all you want to do is create but when you sit down you have no ideas and no motivation? well do I have the perfect Mojovator for you !!!

Have you seen this months Sassy Scrapper's sketch challenge? I will remind you all....


 This is my interpretation of the sketch and I have given it a little twist as it seems I do not follow instructions very well, you will see what I mean....


So as you can see I have flipped it and substitute the Hexagons for butterflies.....  Dont you just love this paper from October Afternoon Woodland Park?


I love the rich colours and dont forget to add a little mist behind your focal areas to add more interest and to make objects stand out.


The added bonus in October Afternoon Woodland Park  Miscellany embellishment pack is you get some Steam binding and if you want it more crinkled you just screw it up and stick it in your pocket for a while.....


October Afternoon Woodland Park Miscellany

 
Woodland Park Cat Tail Pond
 
Woodland Park Huckleberry Hill
Don't forget fussy cutting out objects like these Butterflies make great embellishments when you add a little bit of foam mount under them.

So why don't you come and play with the sketch, cant wait to see what you come up with......

All products are available here Sassy Scrapper Store -October Afternoon Woodland Park


Tuesday 19 February 2013

Live, Love, Laugh Beyond The Page Tutorial

Hi There!

Shell Carman with you today. I hope you are all keeping cool & staying out of the heat!
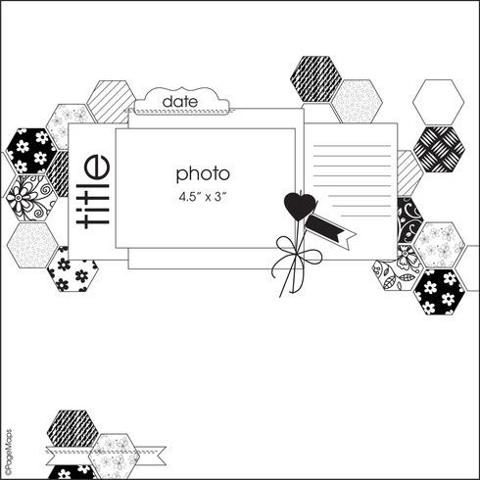
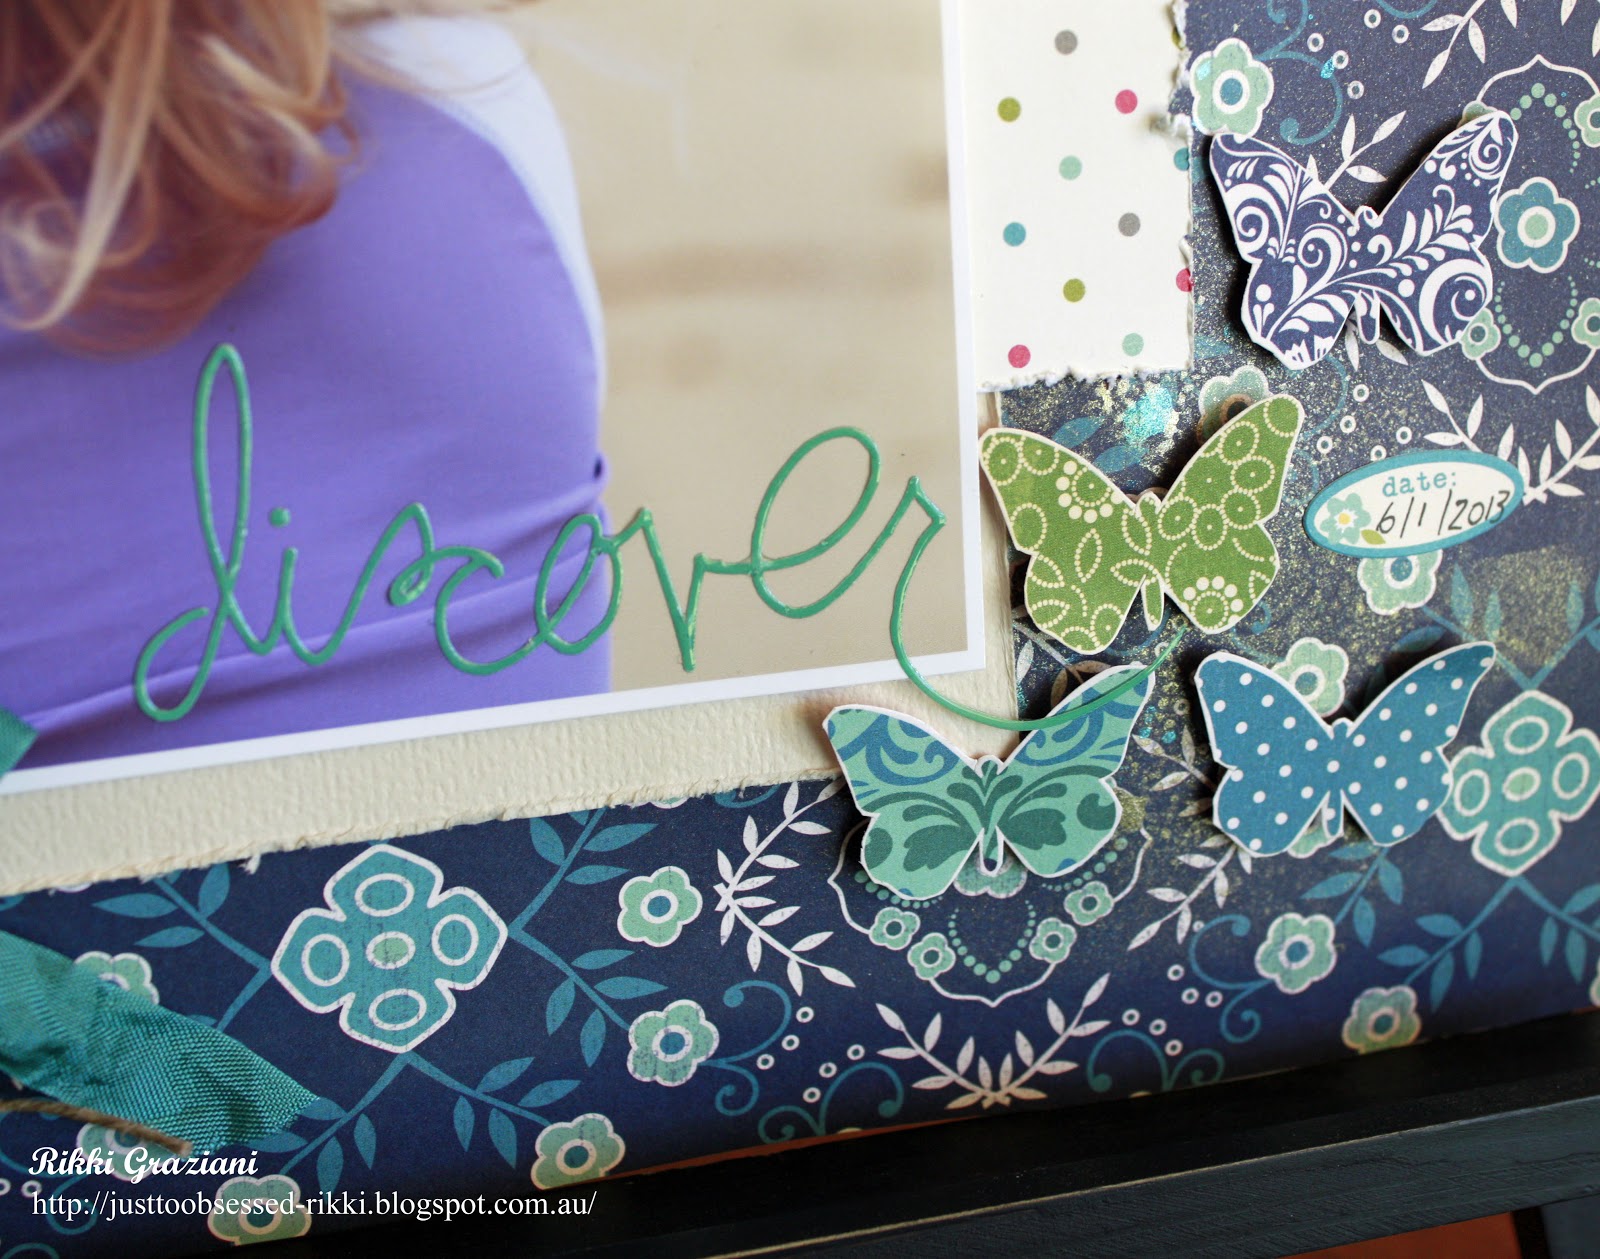
Today I'm sharing a Beyond The Page tutorial using the gorgeous Kaisercraft Small Photo Display & Flora Delight Collection!


You will need
Kaisercraft small photo Display
Kaisercraft paint Magenta
Gesso
Glue
Foam Tape
Modge Podge or Glossy Accents
Crackle Medium
Shimmerz Enamelz Sparkalicious
Shimmerz Magenta
Ribbon
Green Tara Blossoms
Kaisercraft Blooms Coral
Kaisercraft Mini Blooms Olive
Kaisercraft Flora Delight Sticker Sheet
Kaisercraft Flora Delight Collectables
Kaisercraft Wooden Flourish Frames
Kaisercraft Wooden Flourish Live Love Laugh
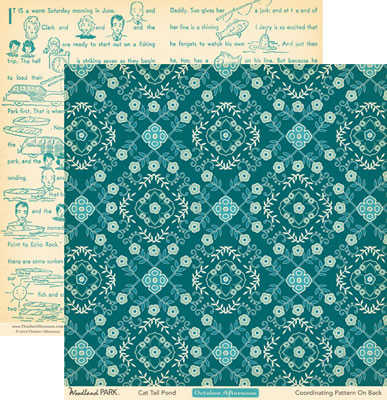
Kaisercraft Flora Delight Vintage
Kaisercraft Flora Delight Enchanting
Kaisercraft Flora Delight Regency
Kaisercraft Flora Delight Reflections

1. Start by painting the frame with 2 coats of gesso. Once dry paint 1 coat of Magenta Paint. Once dry paint a coat of crackle medium & finiah with a final top coat of gesso
2. Dry the top coat of gesso with a heat gun putting the heat gun close to the frame to create heat bubbles
3. Once dry take a emery board or some sand paper & lightly sand parts of the frame so that the gesso wears away & shows the magenta paint underneath
4. Take the Vinatge sheet & cut a 6X4 inch piece
5. Take the Reflections sheet & cut a 6X4 inch piece
6. Take the Enchanting sheet & cut a 4X3 inch piece
7. Take the Regency sheet & cut a 4X3 inch piece
8. Stick the cut pieces onto the frame working from the back of the frame


9. Turn the frame over & run a bead of glue around the edges. Stick the base to the frame
10. Take the small & large oval frame. Prime with gesso. Once dry paint a coat of magenta paint. Once dry paint a coat of modge podge or Glossy Accents. While this is wet sprinkle some Shimmerz Enamelz over the top. Dry with a heat gun. The Enamelz will crystalize to give a sugared appearance
11. Take the wooden words. Coat with gesso then paint Shimmerz Magenta. Leave it to dry
12. Take the sticker sheet using the large floral border sticker. Cut to fit frame placing top centre & bottom right edges. Take the fine magenta leaf border & run this down the centre edge of the frame. Trim off excess

13. Take the small oval frame. Choose an oval frame from the collectable pack & stick these together. Choose one of the sayings from the collectable pack (I have used 'Always remember if you smile the world smiles back') Use some foam tape to stick to the bottom of the small oval frame. Use foam tape to stick this on the main fram in the top right section. Use some of the offcuts from the label on the paper to decorate the outside of the frame

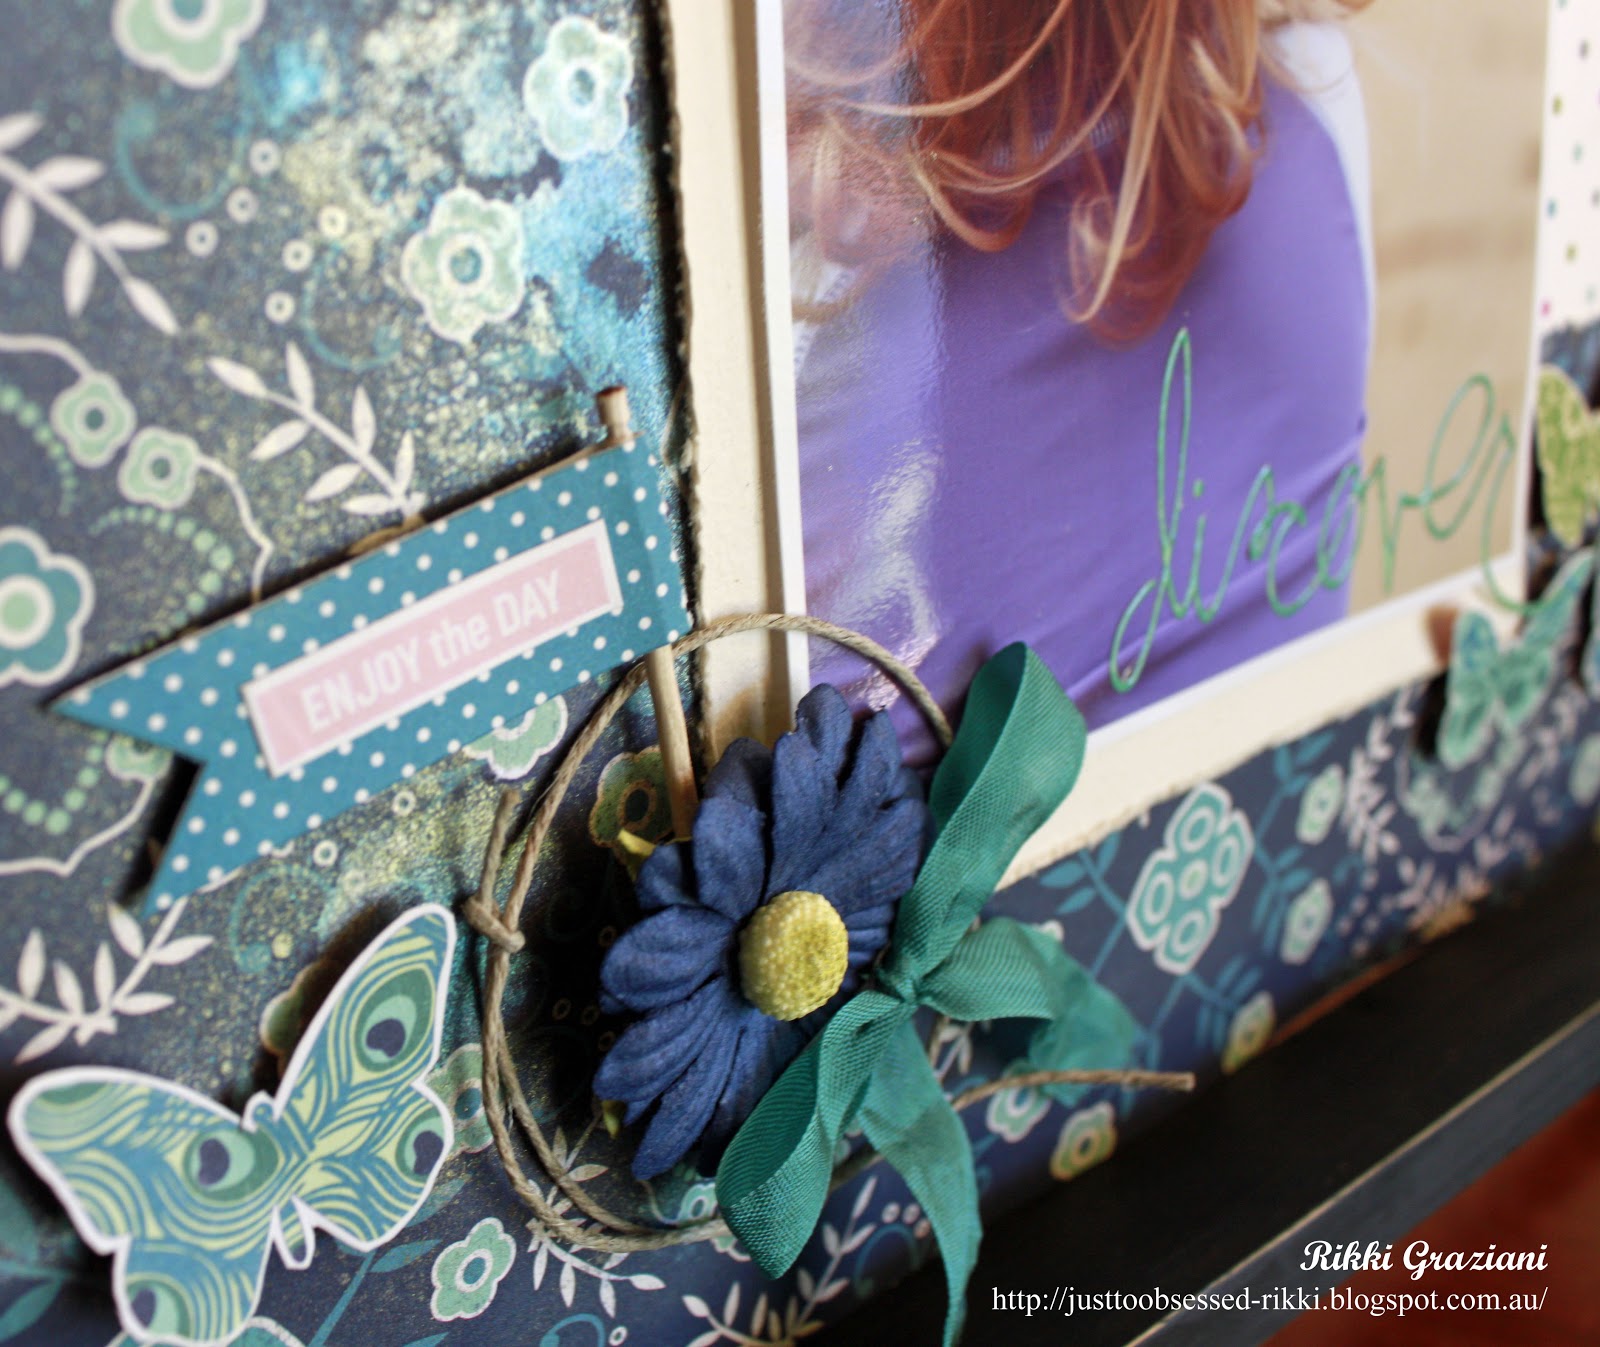
14. Take the ribbon & make a double bow. Stick some flowers on each side & in the centre. Stick the ribbon down on the right edge
15.Take the large oval frame. Choose a large frame from the collectables pack. Stick these together. Stick the live, laugh, love words on top
16. Choose a large floral cut out from the collectbales pack. Stick some flowers & mini bloom in the centre. Stick this piece on the top centre edge. Add some floral stickers to each side of the ribbon.
Choose a small floral sticker. Stick a flower & mini bloom on top. Stick on bottom left edge of frame. Use foam tape underneath stickers if it requires extra support
17. Decide whe2 you would like to add your photos. I have used a 2x3 inch photo for the bottom right frame 2X1.5 inch photo for the top left edge of the frame


I hope you enjoyed this tutorial!
You can find the Kaisercraft products in the store here & the Shimmerz products here

Don't forget there is still time to enter the February Sketch Comp. Details are in the blog side bar!

Thanks for looking
Cheers!
09 10