Showing posts with label Mothers Day. Show all posts

Friday, 22 April 2016

Leanne | Mother's Day Mini Books...

Hello Sassy Friends! Today I am sharing a collection of mini books that can easily be converted from a basic card. I am planning to use this collection of Pink Paislee | C'est La Vie paper crafted cards with my children, as Mother's Day gifts for their grandmothers. :)


Step 1. Create a simple card using layers of Pink Paislee C'est La Vie patterned papers. I've made a collection using cardstock sized at approximately 4.5" wide. This is a great opportunity to use up any left over paper scraps!


Step 2. Using plain printer paper, cut to size, slightly smaller in width and length to the card you will insert it into, and staple the sheets together.


Step 3. Apply adhesive to the back to the paper stack to keep it firmly in place once inside the card.


Step 4. Gift as is or (as I plan to do) hand over the mini note books to your children so they can add individual messages to someone special on Mother's Day.


Thanks for visiting ..x

Sassy Supplies:

C'est La Vie Glittered Cork Stickers Hearts C'est La Vie Word Jumble Stickers Word Jumble Black W/Gold Ces't La Vie 12x12 Paper #1 Ces't La Vie 12x12 Paper #10 Ces't La Vie 12x12 Paper #2 Ces't La Vie 12x12 Paper #3 Ces't La Vie 12x12 Paper #6 Ces't La Vie 12x12 Paper #7 Ces't La Vie 12x12 Paper #8 Cienna Mint Alphabet Stickers I AM Enamel Dots 60pk MME Market Street Ashbury Metallic Enamel Dots Fine & Dandy Dies 5/Pkg Bow/Prize Ribbon

Photobucket

Friday, 8 May 2015

Sweet Treat for Mum

Hello again Sassy friends! I hope this week has treated you well!

If you're a Mum, I wish you some relaxing one-on-one time with your stash. If you're creating for Mum, read on, as I show you how to create a card and little gift that will be sure to get the taste buds tingling!


As you might have seen, I'm currently creating with Pink Paislee's Citrus Bliss. I recently treated myself to a new shade of Color Shine for my collection and I kept the box for "something oneday"... Well it certainly gave me inspiration for a sweet (and sour!) treat box.

I started by opening up the Color Shine packaging and lay it flat. I then took my sheet of Flamingo Acetate and traced around the shape. Using a craft knife and a pair of scissors, I went about cutting out the shape of the box, then folding it in the appropriate areas using a bone folder. A line of double-sided tape on a couple of the folds to hold it together, and I have a cute little gift to accompany my card!


I filled the box with sour Fizz Bombs and wrapped a ribbon around it. The tag is made from a 'Pucker up' clear die cut from the Citrus Bliss Ephemera pack. I have given it a coat of adhesive (using my new fave Scrapbook Adhesives transfer sheets) and then matted it with white cardstock so I can make the sentiment more visible and write on the tag.


Punch a hole and thread onto the ribbon.


I have also been lucky enough to babysit a Minc! I have heard and seen so much about this fabulous machine that I could't wait to try it out!!

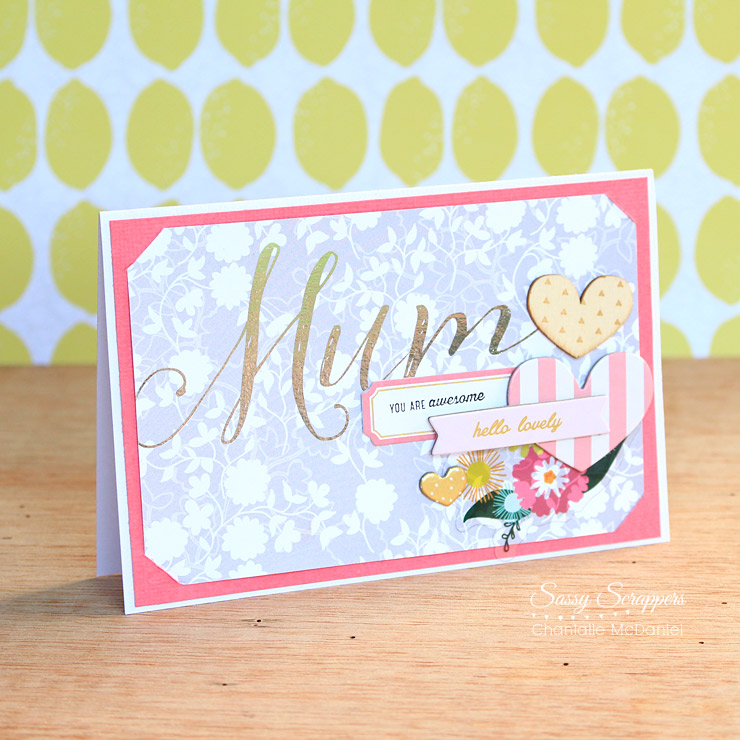
For my card, I have printed off the word 'Mum' (which I set in a word processing programme) through a laser printer. (The foil only works with this type of printing method as it doesn't stick to inkjet prints.)

With the heat setting to 3, I ran the card with some Silver foil over the top, and it came out beautifully! I can't wait to get a few more colours and play around.


The base of the card is just a plain white card. I have cut a piece of cherry cardstock a bit smaller than 4x6 and made some slits into which I slotted the foiled patterned paper. A tip to make them even is to cut a small triangle of paper to use as your guide and then position it in each corner, as shown below. Cut into the marks you have made with a craft knife.


I have also created a co-ordinating envelope using a WRMK Envelope Punchboard which I'm quite smitten with.


This is how the card turned out... I have embellished simply, using some chipboard hearts stickers, a tag and clear die cut from the ephemera pack and a heart-shaped wood veneer.


Thank you so much for popping in today. Wishing you a very special weekend indeed.

Chantalle x


Friday, 1 May 2015

Gifts for Mum

Hello Sassy Friends and happy 1st of May!

Brrrr, I must be getting a touch softer, as I am certainly feeling the cold snap we are having up here in Brisbane. I'm missing the balmy evenings already!

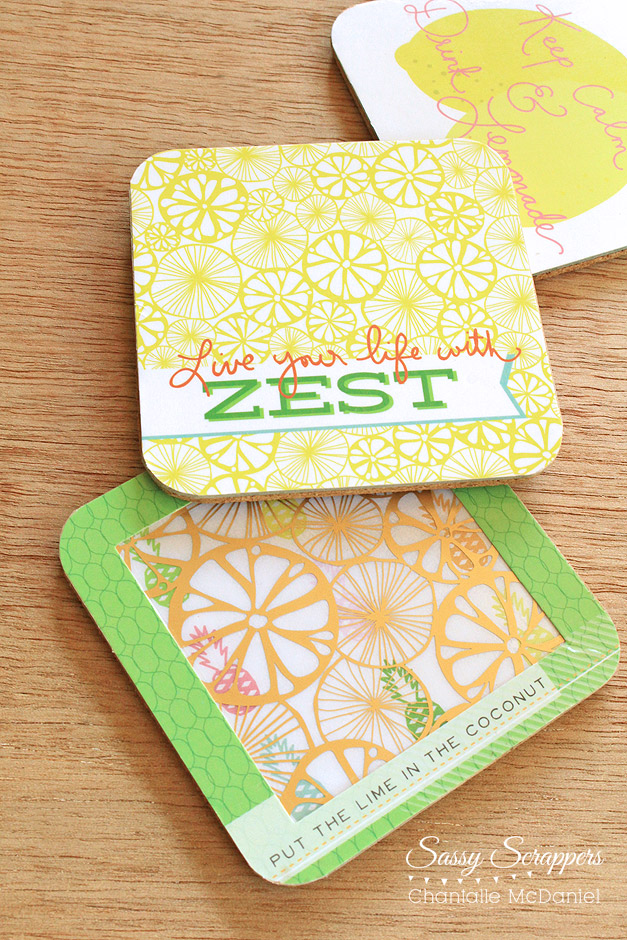
The juicy new Citrus Bliss collection from Pink Paislee is making me miss Summer even more. Luckily, I can get a dose of sunshine with every sip and you can too, as I show you how to make some gorgeous coasters you can whip up for a gift (Mother's Day is just a few days away!) or keep for yourself ;)

It all started when I opened my pack of Citrus Bliss Instagram Cards. The shape, the size and the some of the fun drink-inspired sentiments were just shouting out to be made into something for the table.

It just so happened that I found a near perfect size pack of coasters/pot holders from my local discount store for about $3! I used my WRMK Corner Chomper to round the edges.


Next, I adhered my Instagram cards to pieces of lightweight chipboard, cut down to roughly the same size. Make sure your adhesive (I used Helmar 450 Quick Dry) is as close to the edges as possible so it seals up nicely. Trim off the excess chipboard.


I have used an acrylic card layered on top of a paper card for two of the coasters. Acrylic can be a tricky thing to stick down as the adhesive usually shows. I recently discovered some fabulous Adhesive Transfer Sheets from Scrapbook Adhesives - which we will hopefully be stocking very soon!

They are awesome, you simply peel back the protective backing paper, lay your item on top of the adhesive, give it a good rub and then peel your item off slowly. It gives an even coat of adhesive all over, so you don't have any glue showing through, which is fantastic for clear items!

Above: The acrylic card shown on the adhesive transfer sheet. I simply peeled it off and then adhered it my cardstock card.

Here is a demo video from my Instagram feed @chantallemcdaniel


Once I had prepared my cards onto chipboard, I went ahead and adhered them to the base cork layers. The size of the cork was slightly larger than the paper, so I trimmed off the excess with a sharp craft knife and then rounded the edges with a sanding block. The sanding really made a difference to the finish, as it smoothed the edges beautifully.


 Lastly, I covered the top of the coasters with a layer of clear contact. Make sure to smooth out any air bubbles. This gives them a water resistant finish.


Have fun mixing different cards to create custom layers!


Make Mum's day by serving her a tasty glass of yummy fruit infused water 


or if you want to spice it up a bit...

 
Cheers!

Chantalle

 
 Citrus Bliss Instagram Cards 4"X4" 24/Pkg


09 10