Showing posts with label gold. Show all posts

Monday, 6 April 2015

Project Life | Week Eight...

Hello Sassy Friends!  Welcome to another instalment of PL2015.  This week I am sharing Week Eight | 23 Feb -  1 Mar, using the delightful Simple Stories I Am and Crate Paper Craft Market collections.

And after a week of wet weather, seen previously here, I needed a splash of colour and elegance for Week Eight.


This week I Am journaling cards are the star feature.  It was incredibly easy to put this spread together based on the patterned papers alone.


I did add a few touches here and there, but nothing to detract from the already gorgeousness of these cards.  I mean... Who doesn't love a little gold foil or bling at the moments??? *grin*


The 4x6 horizontal journaling card in itself would have been perfect for this spread. It is quite easily enough, but I wanted to add a tiny touch of gold glitter and slight dimension - nothing too bold.  After all, I want things to be cohesive! And I did request elegance!

 
Another extra touch of gold that was added to my page, was so simple, all I had to do was reach for my gold journaling pen.  Remember all that wet weather? Well, this week I took a photo of our blue skies and non threatening clouds!


The cute paper plane chipboard sticker is from MAMBI and all I had to do was add a little dot trail with my journaling pen.


With my "Week In Review" journaling pocket, I wanted to draw the eye down towards it with the use of more colour.


The squirrel and tag from the Craft Market Ephemera pack add just the right amount and pop of colour to create that visual triangle. The today chipboard sticker is also from the MAMBI pack.


On page two I chose to add more photos than filler cards.


My title pocket was inspired by this month's Mood board. See over here to your right >>>.
 
 
For the most part, I didn't alter the Simple Stories | 3x4 Journaling Cards Elements.


 But I did add a sticker of two from the Simple Stories | Expressions Cardstock Stickers, directly to photos.
 
And finally, I've added any other ephemera, like the Amy Tangerine | gold foil Stitched diecut, which has gold foil or glitter, to my pockets where white space was begging for a little something.
 
 
Thanks for joining me here today. I hope I've enticed you to use something gold on your Project Life spread this week..x
 
 
Sassy Supplies:
 
MAMBI | Vacation Chipboard Stickers
 
Craft Market | Ephemera Pack
Craft Market | Handmade Paper
Craft Market | Inspired Gold Foil
Craft Market | Project w/ gold glitter
 
Simple Stories | 4x6 Horizontal Journaling
Simple Stories | 3x4 Journaling Card Elements
Simple Stories | Expressions Cardstock Stickers
Simple Stories | Enamel Dots 60 pk
 
Heidi Swapp | Colorshine BLUSH
 
Amy Tangerine | Stitched Cardstock Diecuts


Photobucket

Friday, 6 March 2015

Beautiful girl on a journey

Hi Sassy friends!

Woot, it's nearly the end of another busy week - yippee!

My stunning Niece shines in my moodboard page for this month. Anita has put together another cracker for March, which really got my creative juices flowing!

 The brushstrokes in the board caught my eye straight away. I have created a 'cheats' brushed background using Pink Paislee stamps, some gold embossing powder and one thick slick of gold paint on a wide brush. The irony of it is, that one can hardly tell which gold is the paint and which is embossed!
Gold on the left is paint and gold on the right is Ranger embossing powder!
The feather is a die cut which I had in my stash. I have used some soft, diluted Twinkling H2O's over the top to tie it in with the colour palette.
 
 Still obsessed with my metallic thread, messy stitching dots my page!

It's easy to create your own layered elements... In my cluster, I have used a gold die cut frame, a pantone swatch and a rose from a Maggie Holmes ephemera pack and stitched them together with my sewing machine, using top stitch thread for a defined line of stitching. The layers are then continued with some more die cuts (feather is New My Mind's Eye Niche), a Heidi Swapp glitter sticker, a wood veneer word and some expression stickers from the new Simple Stories collections which are in store now.

A couple of enamel dots, wood veneer and smatterings of Color Shine finish the page.

Thank you so much for stopping in. I can't wait to see what you create!

Have a great weekend!
Chantalle x


 I AM Chipboard Stickers 39pkRanger Gold Embossing Powder 56ozColor Wash Clear Stamps  Heidi Swapp Gold Glitter Banner ShapesDoodlebug Sprinkles Lily White AssortmentMaggie Holmes Flea Market Ephemera Pack
 
Make Pretty Stuff Enamel Confetti

Monday, 26 January 2015

Project Life | Week One title pocket...

Hello Sassy Friends!  It's Leanne here today to share with you a quick and easy tutorial on creating pocket page titles.  This year, instead of just sharing my PL2015 spreads, I thought I'd also share a few basic tutorials about the PL cards I create as part of the process.  What better place to start than with a Week One title pocket card.
 
Step 1. Gather your supplies
 
I have used the following:
 
Yellow Enamel Dots
watercolour paints
"week" clear stamp
sewing maching
 
 
Step 2. Colour the watercolour word


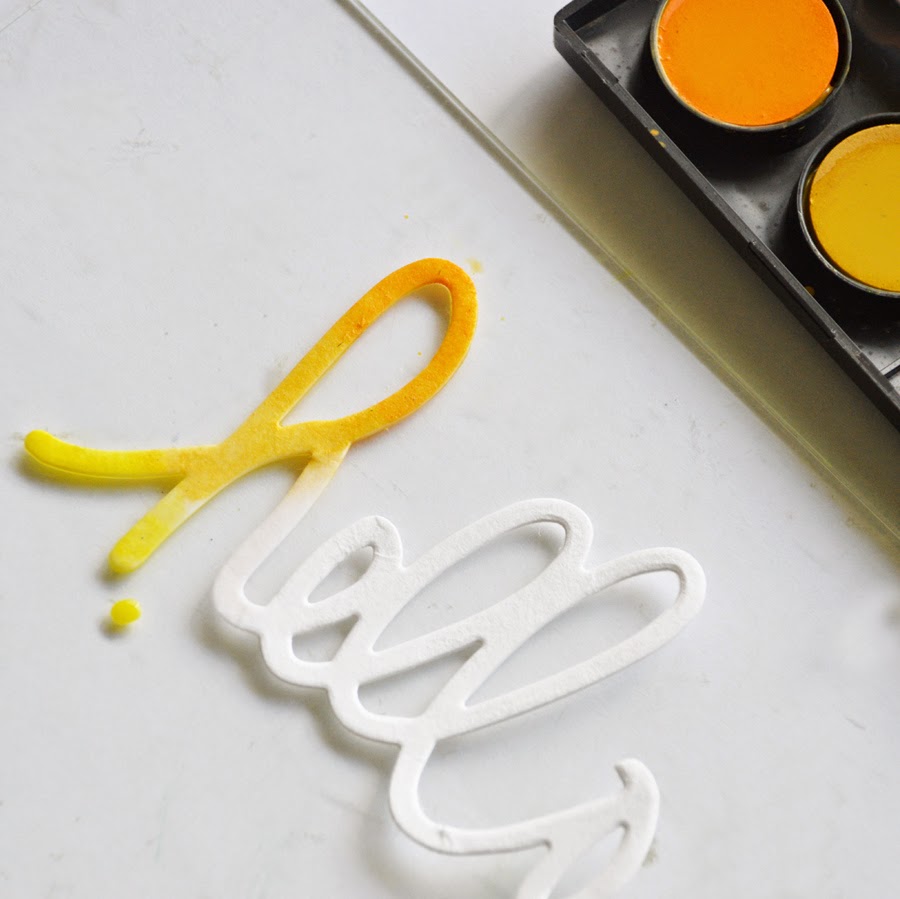
Place the watercolour word on a firm surface. I have used a clear stamp mounting block.  Wet a clean paint brush with water and brush over the word.  Choose three colours from the watercolour paints (I am coordinating with my patterned paper and using the orange/gold/yellow combination). Starting with the deepest colour, paint the top of the letters allowing the water and paint to drag through the watercolour paper.


Take the middle colour and apply to the centre of your word, gently blending as you go.  Add more water/paint to get the desired effect you require.

 
Set aside to dry or use a heat gun if you're impatient like me!
 
 
Step 3. Gold embossing with clear stamps
 
Trim the patterned paper to 4"x6".
Ink your clear stamp with VersaMark Watermark ink and stamp image at the lower middle of the patterned paper.
Completely cover the image with gold embossing powder.
 
 
Once the stamped image has been covered, remove excess embossing powder from the patterned paper.  I like to clean up the stubborn flecks of embossing powder with a dry paintbrush, being careful to not touch the actual image.
Heat emboss using your heat gun.
 
 
Step 4. Layering embellishments

 
Using the sun image from the Dear Lizzy ephemera pack and the clear banner sticker from the Amy Tan sticker sheet, find the centre and adhere to the banner to the top of the sun.


Step 5. Placement

Using the Prima Alphas add the week title next to your stamped image - this is line one.
Place the watercolour word above the first line of embellishments, leaving it off centre and allowing the sun/banner embellishment to also fit on line two. Adhere in place.
 
 
Step 6. Stitching
 
Add a single row of stitching directly to the watercolour word, attaching it to the patterned paper 4"x6" card.  I have used white thread.
 
 
Step 7. Ombre enamel dots

Add a trio of small yellow/orange enamel dots to the lower right corner of the card.  Allow the dots to form a triangle and overlap the other embellishments.


Step 8. Add Colorshine

 
To complete the title pocket card, add a few drops of Heidi Swapp colorshine to the top right corner. Allow to dry before inserting the PL card into its designated PL pocket.
 
 
And here is the completed card!

Join me next week to see how I incorporated it into my PL2015 Week One spread.  Thanks for visiting..x
 
 
Sassy Supplies:
 
Amy Tangerine Stitched Interlock 12x12 Paper
 
Amy Tan Stitched Accent and Phrase Stickers
 
Dear Lizzy Serendipity Watercolour Words
 
Dear Lizzy Serendipity Ephemera Pieces with Rose Gold
 
Zing Gold Glitter Embossing Powder 1oz
 
Colour Shine Spritz Gold Lame 2oz
 
Versa Mark Watermark Stamp Cube
 
Sun Kiss Alphabet Stickers
Photobucket
09 10