Showing posts with label photo flip pockets. Show all posts

Monday, 8 September 2014

Project Life | Week 32...

Hi Everyone!  It's Leanne here today with a fifth instalment from the Sassy Scrapper August Project Life kit!  I can tell you that there is so much product in these kits, that I can even make a sixth spread!  They are brilliant value.  Check out the last remaining kit for August here..
This week I've played with the colours that make up the kit.
 

Similar to previous weeks, (28, 29, 30 & 31) using this kit, I've been conscious of creating an even spread to prevent my photos and the PL cards from clashing.  What seems to work best for me, is to have a dominant colour, to draw your eye about the spread.  In this kit I am using teal for this purpose.  The remaining colours, mostly neutral, then help ground my pages and blend them all together. The final element of colour is the 10% pop.  You will notice in the photo above, it is the tiny amounts of red. 
 
 
The filler cards are a great place to add these small colour pops.  Especially if this colour doesn't feature in any of your photos.  However, I've been fortunate enough to have my children's clothing and kit colours match reasonably well!!!  I. Don't. Know. How. This Happens! LOL!  I guess I am really lucky some weeks.  *grin*


This week I also wanted to have certain days stand out.  During the week, my youngest and I went off to the local library.  It was his first 'official' visit in the sense that he could now have a library card of his own. 
 
 
One of the PL 4x6 cards had the days of the week printed on it, with room for journaling beside it.  I trimmed the day names I wanted to document from this week and added a sticker or two.  Since we were at the library, I thought the label sticker "the story:" seemed rather appropriate!
 
 
I've altered other 4x6 PL cards in this kit, to accommodate journaling.  I've left the embellishments simple by using the already existing pattern and highlighting it with a cluster of layered stickers and a few enamel dots.
 

...............................................................................................................


On page two, I've focused on our main event for the week.  Our camping expedition was at the request of my husband, to celebrate an early birthday with our camping family. However, the weekend was perfect to record another milestone in our family history.  Cameron learnt to ride his bike without the aid of training wheels.  yay! LOL!  


I've used a Simple Stories photo flip pocket to help add more to the story.  And with moments like these, it is always wonderful to have video footage.  Beneath the filler card, I've added an extra photo of my boy and his bike and a QR code of the moment he first started pedalling.  Definitely a treasured memory.


A second QR code was added with everyone on our campsite singing the birthday song.
 
 
Each QR code has been printed out in a similar colour to the kit's core colour and then grounded with simple enamel dot embellishments.
 
 
Finally,  I have a confession.  My all time favourite embellishment this month has to be the Studio Calico cork stars.  I have used every. single. one! They are such a fun element to add to your pages.  And even the photo of the Super Moon event looks better and definitely more exaggerated!


I hope I've shared a little more inspiration today with this fabulous kit.  Thanks for visiting..x


Project Life - August Kit
 
Captured Moments 12x12 Multi Pocket Pages 2
 
Simple Stories Sn@p Photo Flip Pockets Variety Pack
Photobucket

Monday, 25 August 2014

Project Life | Week 30...

Hi There Project Life friends!  It's Leanne here today with Week 30 | July 21 - 27. 
 
 Today I wanted to share my thought processes concerning horizontal linear shapes and lines when creating my PL spreads.  Again, it's a simple and common thing to do, but this week seems like a good example to share with you all. Especially with the added touches of strip journaling! 
 
 
Linear lines were necessary this week, to bind the entire spread together.  I had many photos to include and lots of titbits of journaling as well.  My solution was to link the story directly to the photo with strips of typed text.


My page one started off simple enough.  Photo collages and 4"x4" photos printed onto 4"x6" photo sheets were slipped into the top and bottom pockets. I also used four 3"x4" photos in the middle row, but because of the white space (literally) on the 4"x6" photos, I wanted the filler cards to be relatively simple (and clean) too.


The embellishments then sort of took on a life of their own.  Once the journaling was added to the cards, I wanted to make a clear connection between them visually.  This is where my linear lines started to evolve.  In the photo above, you can see the three strips of embellishment text/phrase stickers.  They help draw your eye across my pages and reminds the viewer that there are stories here among the multitudes of photos! *grin*


My title page also sports a few linear lines with the embellishment stickers lined up in bold strips to announce which week I am documenting. The colourful banner may not be entirely linear, but every now and then, I like to add a few surprises on my pages where the eye needs to stop and process what the difference is, before moving on.


On page two, the journaling strips are out in full force.  There are no blocks of journaling used here, as repetition from the opposite page.  These strip notes and embellishments however, continue to carry my idea over from the first page. Including the striped filler card shown above.


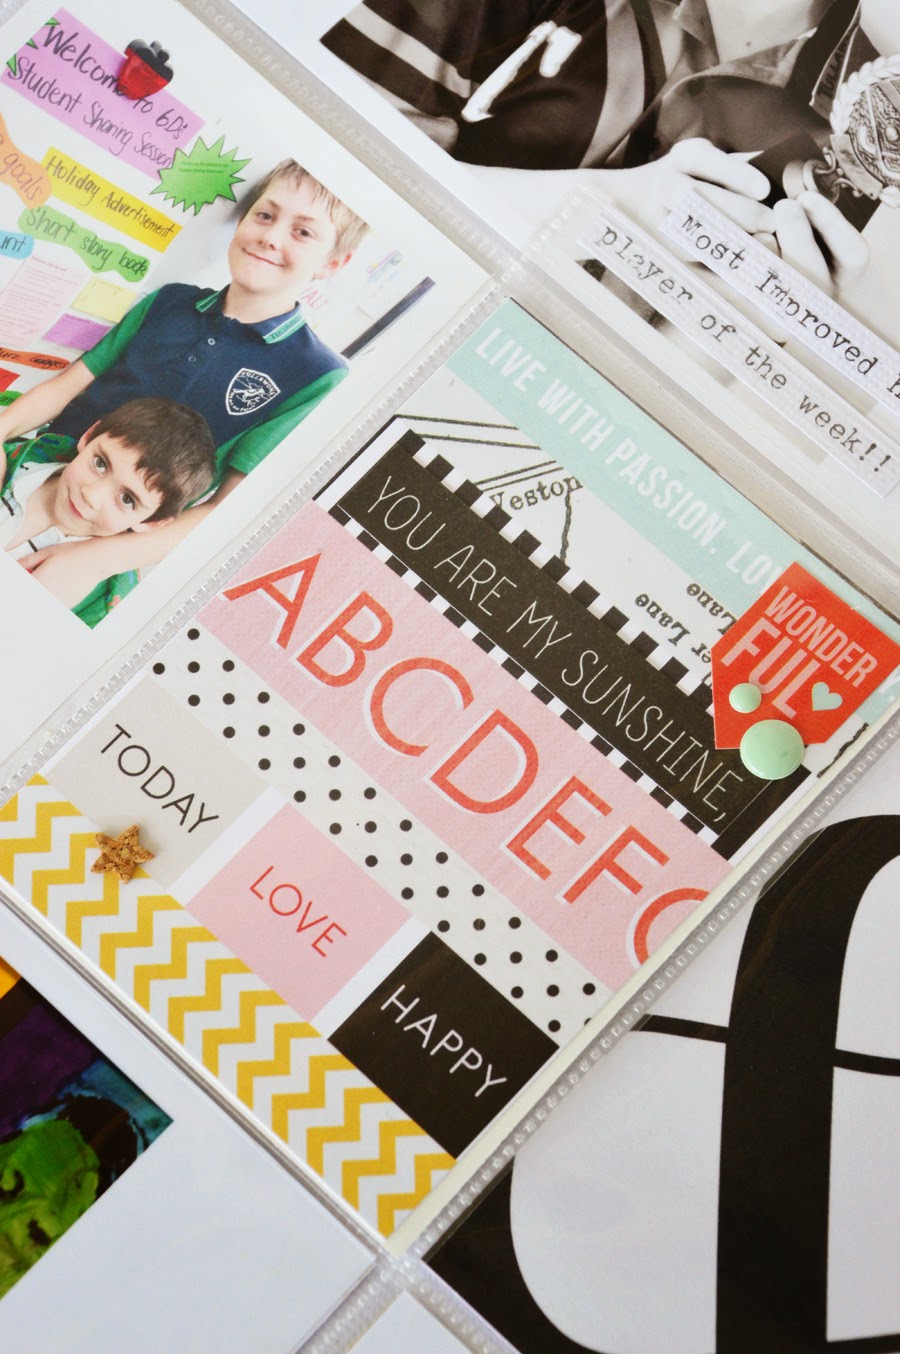
This week I also had the pleasure of entering my boys' classrooms for parent/teacher interviews.  I wanted the images included in my Project Life to be similar.  Not only because of the correlation between the two photos and the event, but I also wanted to include snippets of information relating to the boys and their classes, below the square cropped photos.


I've used another Simple Stories photo flip pocket to include the school photos around the filler card, trimmed from the Teresa Collins patterned paper, for the "ABC" print.
 
 
The remainder of my spread shares informal and daily details from our week.  There are still hints of layers and linear lines found here as well.


 The best part of creating linear elements on your spread, are the visual connections between story and photo/ephemera.  If you have a lot of photos, this simple method can help prevent the lack of documentation becoming a problem.  Even if the strip journaling is only in point form, it still helps record part of your story.
 
 
Thanks for visiting..x
Project Life - August Kit
Captured Moments 12x12 Multi Pocket Pages 2
 
Simple Stories Sn@p Photo Flip Pockets Variety Pack
 
Photobucket

Monday, 18 August 2014

Project Life | Week 29...

Hi there Project Lifers!! Welcome to another PL blog post Week 29 | July 14 - 20.  It's Leanne here today and this week I am continuing to play with the fabulous August Project Life kit.  Have you checked it out in store yet?
 

This week I have focused on photos - iPhone photos that is.  Every single image for this week has been captured on my phone.  Clearly I neglected my grown up camera during this time! *grin*


To balance the high volume of photos on this week's spread, I've kept my title pocket clean and simple.  This PL card could have been allocated for more journaling but instead I've opted for a cluster of layers, created from the embellishments included in the August kit.


As I was scrolling through the photos on my phone I discovered that I had quite a number of them which I wanted to include.  Lots of photos and minimal photo pockets usually means a few photo collages for me!  LOL!

 
Again, to offset the number of photos, I made sure I put aside areas specific for journaling.  I typed directly onto the Kaisercraft Captured Moments PL cards.
 

When it comes to journaling certain aspects of the week, I try to keep the content relating to the photos, found nearby or at least on the same page.


On page two, the Simple Stories Photo Flip pockets have once again come to my rescue.  I've added extra photos beneath and to the back of the altered PL card.


The filler card on this page has been left as is.  The sentiment alone, was enough for me.  I simply trimmed the Teresa Collins patterned paper down to size. 


Because I couldn't fit all the information I wanted onto the spread, I've included a QR Code.  This little video shares more detail of my son visiting our local War Plane Museum.


When I have a lot of photos to include, I try to keep in mind the colours that will be shared.  Including a few black and white photos counteracts any clashing colours that may come across with the everyday photo captures. 
 
Thanks for visiting today...x
 
Project Life - August Kit
Captured Moments 12x12 Multi Pocket Pages 2
 
Simple Stories Sn@p Photo Flip Pockets Variety Pack
Photobucket
09 10