Showing posts with label Distress Oxide Ink. Show all posts

Tuesday, 28 August 2018

Home | Pink Paislee Auburn Lane | Agnus Kasprzak

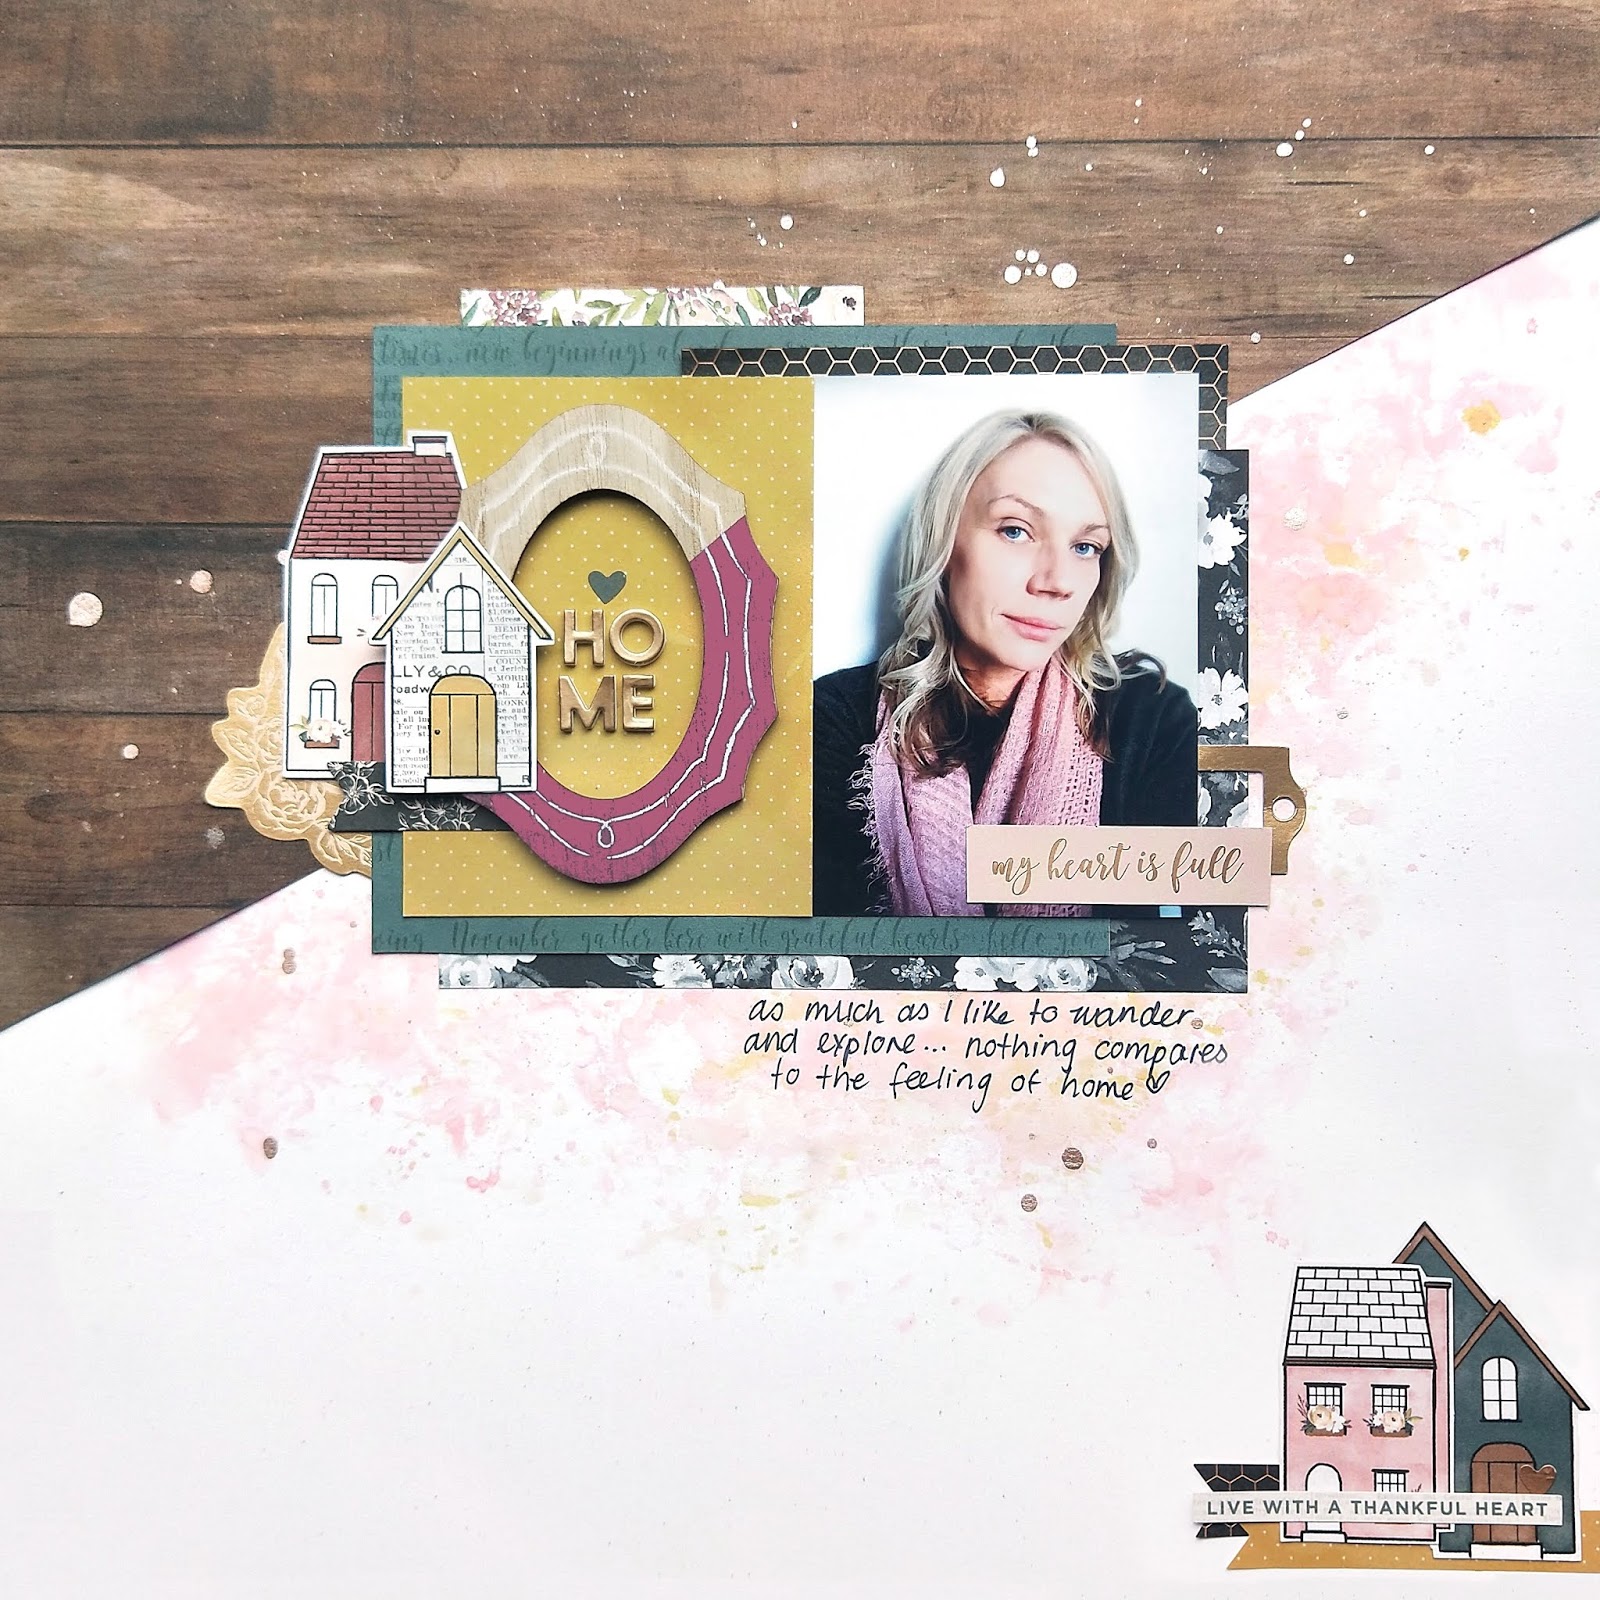
Hi again :) I've got a scrapbook layout to share today using more beautiful items from Pink Paislee's Auburn Lane collection. 


I loved how this range worked in my project life album, which I shared here and here and thought that it would be perfect for a layout too.


This collection has lots of gorgeous rich tones and copper foil accents but I wanted to achieve a light and airy feel to my page, so I used the patterns sparingly in a series of layers built up beneath my photo which allowed me to use lots of different patterns without overwhelming the page.  I used mini thickers to create my title and framed it with one of the wood veneer frames from the collection to prevent it from getting lost on the page, and cut out a few mini houses from the paper range to reinforce my theme. 


To give the bottom half of my page which was prominently white a sense of depth, I added layers of distress inks using the 'ink smooshing' method which basically involves applying the ink to a slick surface (left over packaging) then spraying the ink with water before pressing it onto the page in a random manner. 


I like how the ink softened the stark white cardstock and helped to balance out the mustard and pink colours featured on the page. 


Products from the Sassy store...
Auburn Lane Die-cut Ephemera w/Copper Foil
Auburn Lane 6x8" Paper Pad w/Copper Foil
Auburn Lane Wood Veneer Frames 
Auburn Lane Cardstock Label Stickers w/Copper Foil
Auburn Lane Happy Life Mini Alpha Thickers
Auburn Lane 12x12 Cardstock - Paper No.1
Auburn Lane 12x12 Cardstock - Paper No.2
Auburn Lane 12x12 Cardstock - Paper No.11
Auburn Lane 12x12 Cardstock - Paper No.10
Auburn Lane 12x12 Cardstock - Paper No.6
Auburn Lane 12x12 Cardstock - Paper No.5
Auburn Lane 12x12 Cardstock - Paper No.8
Tim Holtz Distress Oxide Inkpad - Worn Lipstick
Tim Holtz Distress Inkpad - Fossilized Amber
Distress Stain Spray - Antiqued Bronze
Bazzill Classics Smooth White Cardstock 12x12 


Photobucket

Thursday, 21 September 2017

Fly High Mixed Media Tag by Farrel Tailor

Hello and happy Thursday everyone!!! 
Today I am sharing with you all my very first mixed media tag. I had so much fun creating this tag and can't wait to create some more!! There is a process video at the bottom of the blog if you would like to see how I created the tag.

To create the tag, I used the packaging from a 2 minute noodle box and covered it with Prima Rose Quartz - Grateful Heart pp. 

Then using the dabbing technique I applied the following Distress Oxide Inks - Twisted Citron, Peacock Feathers, Abandoned Coral and Wild Honey. (I stamped the inks onto my craft mat and spritzed with water before dabbing and dried in between colours)


Once I was happy with the colours for my background, I then used the font stamp from Darkroom Door Hummingbirds set. Using the same stamp set, I stamped the hummingbird and leafy branch onto some white cardstock and used Lindy's Stamp Gang Embossing Powder - Black Forest Black.

I then cut out the hummingbird and using a waterpen, I then applied Distress Oxide Inks Seedless Preserves and Salty Ocean to my hummingbird and applied some cheesecloth to the back.  I then inked around the edges of the tag using Distress Oxide Ink Black Soot. 


After adhering my stamped bird, I then stamped "Fly High" which is from the same stamp set and added some splattering using Dylusions White Linen Spray.

And there you have it..... a mixed media tag!!!  I hope I have inspired you to create something special.


Until next time - Happy Scrappin' 
Farrel xx


Saturday, 12 August 2017

Make Amazing Happen Card by Farrel Tailor

Hello again Sassy Fans!!

I am back to share with you all a card I made for a very dear friend of mine featuring my all time favourite ink pads....Distress Oxides!! There is a process video which you can watch at the end of the blog.

This is what I created, I don't do cards very often but after making this I may have to start creating them again as I had so much fun.


For the background I started off by inking my craft mat with Distress Oxides - Worn Lipstick, Wilted Violet, Cracked Pistachio and Broken China. I sprayed them with some water and using the dabbing technique, I gently dabbed my cardstock onto the colours until I was happy.


I splattered some Fossilized Amber Distress Oxide using a paint brush and then inked around the edges using Walnut Stain Distress Oxide.


My next step was to create the flowers and I used my mini black archival ink and Vicki Boutin's Floral stamp and die set. Then using my water pen, I painted the flowers using Worn Lipstick, Wilted Violet and Fossilized Amber.


The sentiment and leaves stamp set I used was from my own stash and I used my mini black archival ink for stamping. Then to finish it off I added some white thread and mounted my flowers using foam tape.


Thanks for dropping by and until next time - stay crafty!!!

xx 


Thursday, 13 July 2017

Awesome By Farrel Tailor

Good Morning Sassy Fans!!! Farrel here to share with you all a layout I created using my favourite ink pads ever......Distress Oxides along with some Cocoa Vanilla You Rock products!!!


To start my layout I used Cocoa Vanilla You Rock patterned paper In Line with some white cardstock. I then used some Heavy White Gesso and applied with a silicone brush to add texture.

I used the Kaisercraft Arty Stamp and Versafine to stamp onto the background. It all seemed a little flat so I decided to add some stenciling using Tim Holtz Diamonds stencil with Ranger Texture Paste and felt it was perfect for my photo.


I used Ranger Distress Oxides in Broken China, Fossilized Amber, Wilted Violet and Cracked Pistachio. I used both a wet paint brush and my fingers to apply to the background.


To see the full process please check out my video


Thanks for dropping by 

Photobucket

Thursday, 25 May 2017

Be Beautiful Art Journal Page by Farrel Tailor

Hello Sassy lovelies!!! 

I'm back with another mixed media tutorial for you all today. Last week I featured the amazing Dina Wakley Scribble Sticks and I thought I would do another art journal page using them again but in a different way. I also wanted to show you how to use the incredible Prima Watercolor Resist Pen. 

So let me give you a quick run down of how I created this page and at the end of the post there is a process video if you wanted to see me in action.


So I started by drawing my tulips with a pencil and once I was happy, I then went over it using the Prima Watercolor Resist Pen. This pen is amazing!!!! You have to wait for the liquid to dry and for the best results leave it over night. But I am an impatient scrapper so I used my heat gun and then let sit for about 15 min before I moved on to colouring the flowers. 


So how the Watercolor Resist Pen works is once it's dry, it acts as a seal so you can use this with your watercolour paints or pencils or crayons....anything really.

 So the next thing I did once my resist pen was dry was to use the Dina Wakley Scribble Sticks to colour in my tulips. The colours I used were - Magenta, Lemon, Lime, Sky, Night, Tangerine and Blackberry. I used my water pen to take the pigment from the stick and used them as a watercolour medium.


Next I used the Distress Oxides for my background. I started by blending Broken China and Faded Jeans with a blending tool and then sprayed with water. But I found using my water pen was much easier and I was able to get into the small spaces as seen here with Cracked Pistachio


Once that was all dried, I then had the pleasure in removing the harden liquid from the Watercolor Resist Pen...and all you have to do is use your fingers and rub it off.


I then used Heidi Swapp Magnolia Jane Clear Stamp set Special Words and Icons with Versafine Black Onyx. And to finish it off I used my black and white Uni Posca Pens for highlighting.


Here is the process video


Thanks for dropping by and hopefully I have inspired you to be creative 
Farrel xx


Photobucket

Thursday, 6 April 2017

Our Time Together Mixed Media Layout by Farrel Tailor

Good Morning Everyone, I am back today to share with you all a mixed media layout I created using the amazing Ranger Distress Oxide Inks. 
 

I wanted to create a layout that best matched the photo of my Dad with my youngest son and felt that the 13@rts range Timeless did this perfectly and it also matched the Distress Oxide Inks that I used - how cool is that?!

Here you can see how well the Faded Jeans and Spiced Marmalade Distress Oxide Inks match the papers. I loved using these inks especially when I sprayed water onto them....they are magical and addictive!!


I wanted to see if I could make my own coloured paste so I mixed Distress Oxide Iced Spruce with Prima Art Basics 3D Gloss Gel and used the Dylusions Stencil Old School Alpha. I was really surprised at how awesome it looked and loved it! Something I will definitely be doing with the other colours.


I then added some stamping using a stamp in my stash along with Versafine Onxy Black and then drew some lines around the edges of the page to tie in with the black stamp.

I really enjoyed creating this layout and it's amazing how you really don't need many items to create an eye catching layout and the products I used are perfect for a masculine layout.


Feel free to click on the process video if you would like to see how I created this layout.


Thanks for dropping by and hopefully I have inspired you to create your own mixed media layout.

Happy Scrappin' xx


Photobucket
09 10